Tearing out perfectly good drywall to run new electrical circuits is one of those jobs that balloons fast — contractors quote you a rewire, then a plasterer, then a painter, and suddenly you’re looking at $20,000–$30,000 or more and a house that’s uninhabitable for weeks. Homeowners and project managers who’ve been through it once tend to ask, the second time around, whether there’s a smarter path. There usually is, and it centers on whether an experienced electrician can fish new cable through existing wall cavities without opening everything up.
Yes, a house can be rewired without removing drywall in most cases. Electricians use fish tape, flexible drill bits, and low-profile access holes — typically 2–3 inches across — to route new cable through wall and ceiling cavities. A full rewire of a roughly 2,000 sq ft home done this way typically runs $8,000–$15,000, depending heavily on house age, framing layout, and how much of the existing wiring can be reused as a pull-through guide.
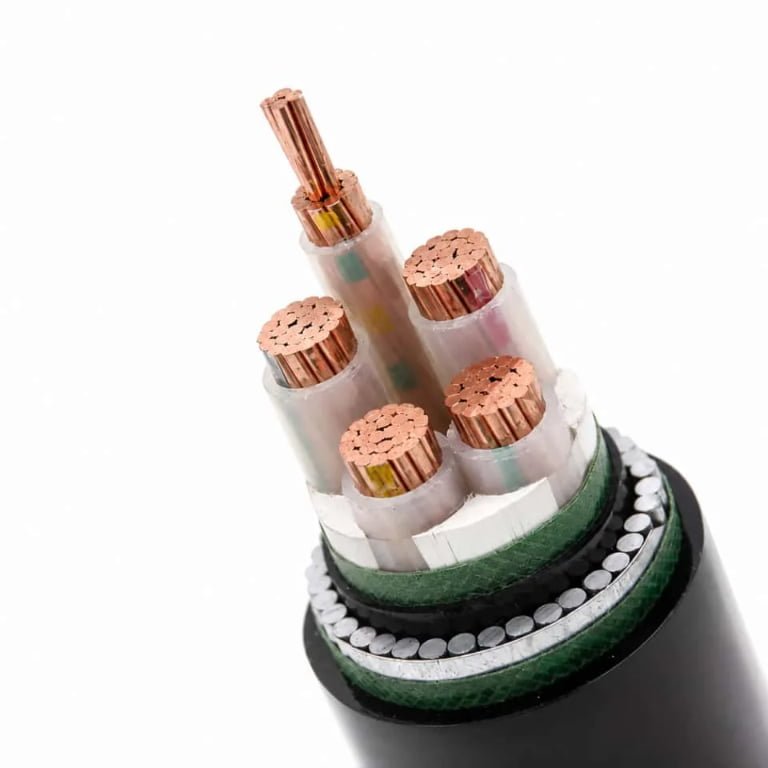
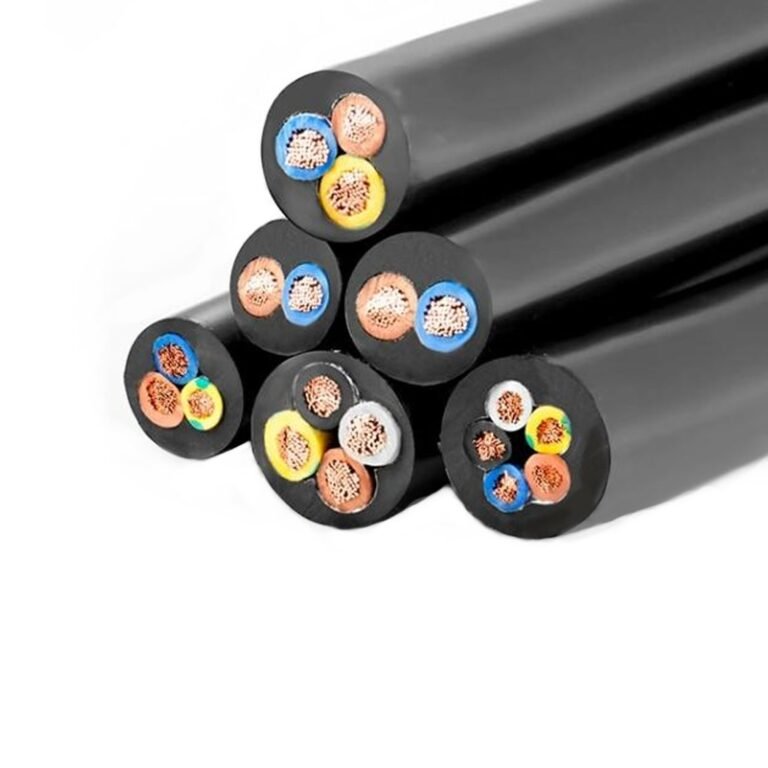
What makes the difference between a clean, minimally invasive job and a nightmare of patch-and-repaint isn’t just technique — it’s the cable itself. Stiff, oversized conductors fight you every time they hit a fire block or a tight bend. Flexible, properly specified wire goes where you need it to go. That distinction matters more than most people expect, and it shapes nearly every decision that follows.
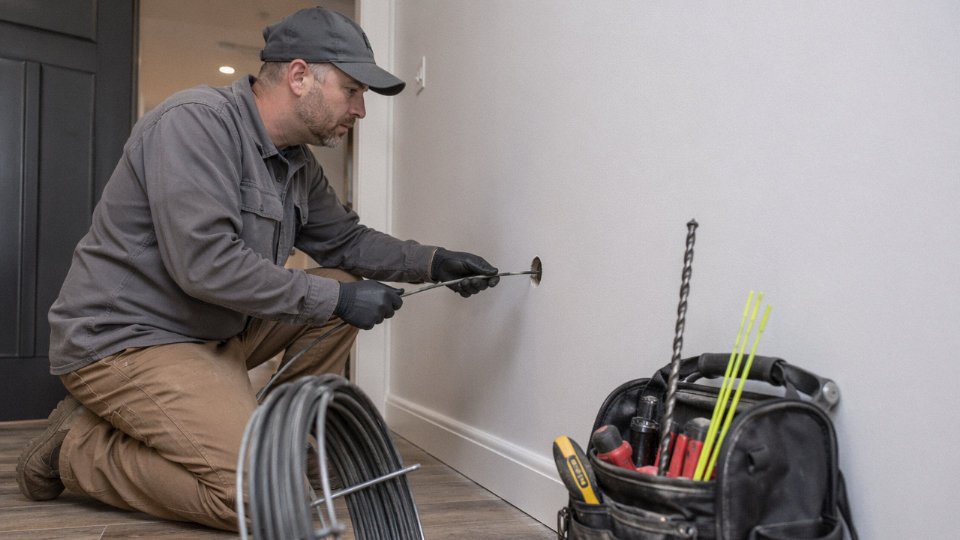
How Electricians Actually Fish Wire Through Finished Walls: Tools and Techniques Explained
Getting new wire from point A to point B inside a finished wall without swinging a hammer through drywall is equal parts planning and tool selection. Done right, it’s genuinely impressive to watch. Done sloppily, you end up with a wall full of exploratory holes and a patch bill that eats half the labor savings you were chasing.
The Core Fishing Tools and Where Each One Fits
Fish tape is the workhorse — a long, coiled strip of spring steel or fiberglass that electricians push through wall cavities to pull wire back through. Steel tape, typically 1/8 inch wide, handles straight vertical runs in open stud bays reasonably well and can push through moderate resistance. Fiberglass tape is what you reach for in walls near live panels or anywhere the tape might contact energized components, since it won’t conduct. Lengths run from 25 feet up to 200 feet depending on the reel; for most interior wall drops, a 50–75 foot steel tape covers the majority of situations. The limitation is rigidity — steel tape fights you hard on any horizontal run with bends.
That’s where fish sticks and glow rods earn their keep. Glow rods are interlocking fiberglass sections, usually 3–4 feet each, that screw together to whatever length you need. They’re flexible enough to navigate moderate bends but stiff enough to push through insulated cavities without collapsing. Experienced electricians often use them in horizontal attic runs or through dropped ceilings where a rigid steel tape would either kink or get stuck on a blocking member.
Flexible Drill Bits: The Part Most Homeowners Don’t Know Exists
The real enabler of low-damage rewiring is the flexible drill bit — sometimes called a flex bit or bell hanger’s bit. These are typically 54 to 72 inches long, around 3/8 or 1/2 inch in diameter, and designed to bend through wall cavities while still cutting cleanly through wood plates. An electrician drops one down from a small attic access or feeds it up from a crawl space, drills through the top or bottom plate, and suddenly has a clear path from one floor level to another. The bit has a hole at the tip so you can attach wire directly and pull it back through as you withdraw the bit — one smooth motion. Without these, running wire from attic to first floor without opening walls would require multiple access cuts.
Mapping What’s Hidden Before You Cut Anything
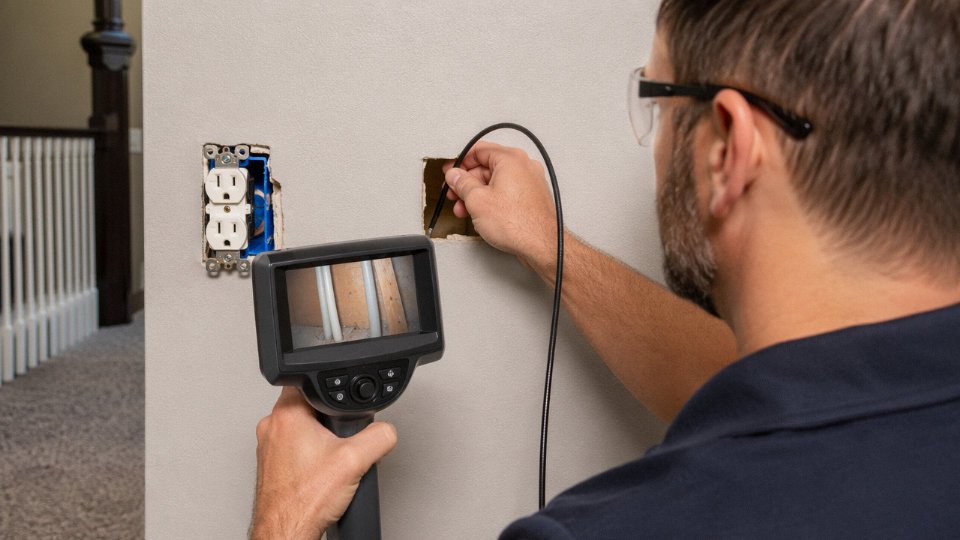
Cutting access holes blind is how you find out a fire block or a plumbing stack is sitting exactly where you planned to run cable. Professional electricians scan before they cut. A good magnetic stud finder locates framing; wire-tracking scanners (brands like Fluke and Klein make decent ones) can trace existing circuits so you’re not drilling into a live wire. A borescope camera — a small flexible camera on a cable that feeds into a 1-inch hole — lets you look inside the wall cavity before committing to a larger cut. Insulation batt, old knob-and-tube remnants, existing conduit, cross-blocking: you want to know all of it before you touch the drywall.
Borescope cameras allow electricians to inspect wall cavities before cutting access holes, reducing the risk of hitting obstructions or existing wiring.True
Borescope cameras are standard diagnostic tools in retrofit electrical work, enabling visual inspection through minimal-diameter holes before any destructive access cuts are made.
Access Holes, Attic Drops, and the Basement-Up Strategy
Even with the best tools, some access points are unavoidable. The goal is minimizing them and locating them somewhere forgiving: inside a closet, behind a baseboard, at junction box locations, or along a wall corner where patching is less visible. Skilled electricians work from a floor plan, tracing every proposed cable run before touching a wall. Running wires horizontally is the hard part — you can’t just fish through a stud bay for a horizontal run because each stud bay is isolated. The cleaner answers are routing up through the attic and dropping down to the device location (attic drop), or running through a crawl space or basement and coming up. Both strategies keep horizontal wall penetrations to a minimum and concentrate the access work at points where the structure already gives you a way in.
The access holes themselves are typically 2–3 inches in diameter for a single cable run — small enough that a standard junction box cover plate or a purpose-made low-voltage bracket covers them entirely once work is done. Baseboard removal is another underused approach: pull a section of baseboard, cut a shallow channel along the wall bottom, route cable, replace the baseboard. No visible patch work at all if the baseboard goes back cleanly.
Pre-planning cable paths isn’t just about aesthetics. Every extra access hole adds maybe 30–60 minutes of patch-and-paint labor. On a whole-house rewire, the difference between a well-planned 12-hole job and a chaotic 40-hole job shows up directly in the final invoice — and in how long the painter is on site afterward.
When Hidden Rewiring Is Not Realistic: Construction Types That Force Drywall Removal
The fishing-wire techniques described earlier work well in a reasonably cooperative house. The problem is that a large share of North American housing stock is not cooperative at all — and discovering that mid-project is expensive. Knowing upfront which construction types resist concealed rewiring saves homeowners from a lowball estimate that balloons, and saves contractors from an argument at the final invoice.
Balloon-Frame Homes (Roughly Pre-1940s)
In balloon framing, the studs run continuously from the sill plate all the way to the roof rafter — no horizontal fire blocking interrupts the cavity. That sounds like it should make cable fishing easier, but in practice it creates the opposite problem. The cavity is so tall and unobstructed that a fish tape has nothing to register against; it tends to fall freely or twist into the wall and disappear. Worse, those open cavities were the original pathway for fire to travel from basement to attic in seconds, which is why modern code requires fire blocking when you open them up anyway. Once you’re adding fire blocking, you’re already cutting drywall in multiple spots per run. On a balloon-frame Victorian with original lath-and-plaster walls — not even drywall — the combination of fragile wall surfaces, no blocking, and complex intersecting cavities typically means selective wall removal is cheaper than fighting it blind.
Concrete Block, Poured Concrete, and Solid Masonry
There is no fishing wire through a 8-inch concrete block wall. Full stop. Your options are surface-mounted conduit (which is visible and sometimes acceptable in a garage or utility space, rarely acceptable in a living room) or chasing — cutting a channel into the masonry, laying cable, and patching with mortar. Chasing is messy, requires a grinder or rotary hammer, and produces a structural cut that needs engineering sign-off in some jurisdictions. Either way, you are not doing a “drywall-free” rewire. The framing around windows and doors in these homes is sometimes wood, which can be fished, but the main wall runs cannot.
Dense Insulation
Blown-in cellulose or dense-pack fiberglass will eat your labor hours. Friction multiplies dramatically — what takes 20 minutes in an empty cavity can take 90 minutes or longer in a dense-packed wall, and the repeated jerking motion needed to advance cable through insulation will abrade the jacket on anything less than a robust outer sheath. LSZH flexible cables handle this better than standard NM-B (“Romex”), but even they have limits. There is also the issue of the insulation itself: pulling a fish tape through dense-pack can displace the fill and create voids that compromise your thermal performance. In practice, any wall that was insulated as part of an energy retrofit in the last 20 years should be flagged for a friction assessment before the electrician quotes a firm price.
Deteriorated or Hazardous Existing Wiring
Knob-and-tube wiring can sometimes be left in place and simply deactivated, with new cable fished alongside it.False
In most jurisdictions, knob-and-tube circuits that remain energized in insulated wall cavities violate current code and create a fire risk. Full circuit replacement is typically required, and that usually demands open-wall access to verify the old wiring has been properly terminated and isolated, not just abandoned in place.
Aluminum branch-circuit wiring from the 1960s–70s presents a similar problem — it is not the aluminum itself that kills you, it is the connections. Every junction, every device, every termination needs to be inspected and upgraded with CO/ALR-rated devices or AlumiConn-style connectors. You cannot do that reliably without seeing what you have, which usually means opening walls at every box location at minimum.
Deteriorated rubber insulation (common in homes from the 1920s through 1940s) crumbles when disturbed. Fishing new cable past old rubber-insulated wiring risks cracking the old jacket and creating a fault. Any inspector worth their license will require full replacement.
Multi-Story Horizontal Fire-Block Drilling
Platform-frame construction — the standard from roughly the 1940s onward — has fire blocking at each floor level. Running cable vertically past that blocking requires drilling through it, which means locating it precisely, drilling a clean hole, and patching. On a single-story run, you might do this once. On a two-story home where you’re running circuits from a basement panel to second-floor bedrooms, you could be drilling and patching fire blocks at multiple points per circuit. At some threshold — usually around 4–6 access cuts per circuit run — the math starts to favor just removing a section of drywall, doing the work cleanly, and re-hanging new board. Patching 14 small holes well is not cheaper than patching one 4-foot section done right.
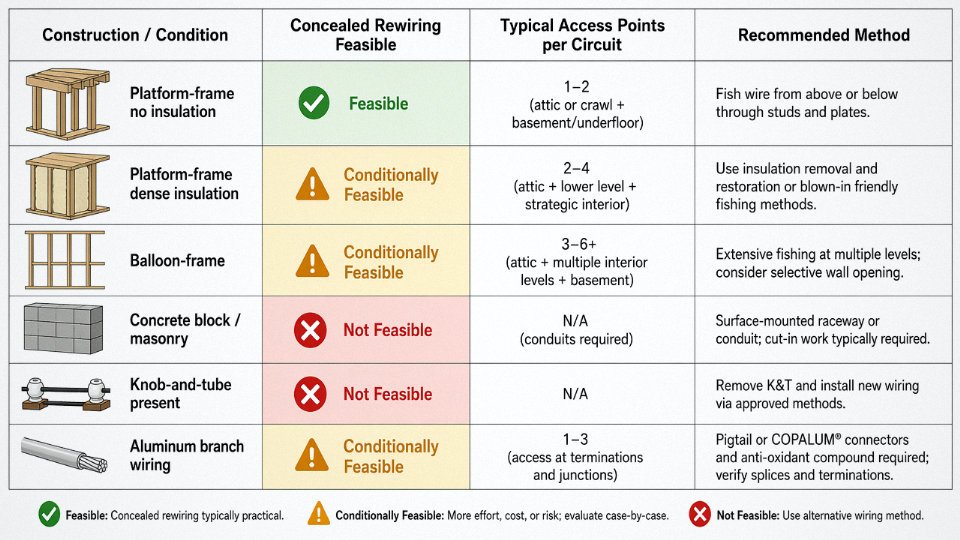
Quick Feasibility Matrix
| Wall / Construction Type | Concealed Rewiring Feasible? | Typical Access Points per Circuit | Notes |
|---|---|---|---|
| Platform-frame, no insulation | Usually yes | 2–4 | Best-case scenario |
| Platform-frame, dense insulation | Sometimes | 4–8 | Jacket abrasion risk; add friction factor to labor |
| Balloon-frame, plaster/drywall | Rarely | 6–12+ | Fire-block requirement adds cuts |
| Concrete block or poured concrete | No | N/A | Surface conduit or chasing required |
| Solid brick/masonry | No | N/A | Chasing only; structural review may apply |
| Homes with knob-and-tube or deteriorated rubber | No | Full circuit open | Safety and code compliance require open-wall access |
| Aluminum branch circuit (needs full replacement) | No | Full circuit open | Every termination point must be accessed |
The honest bottom line: concealed rewiring is a legitimate technique, not a workaround. But it requires the right house. When a contractor quotes a hidden rewire on a pre-1940s brick colonial without walking every room and probing the wall construction, be skeptical. That quote will change.
Cable Specifications That Make or Break a Concealed Rewiring Project
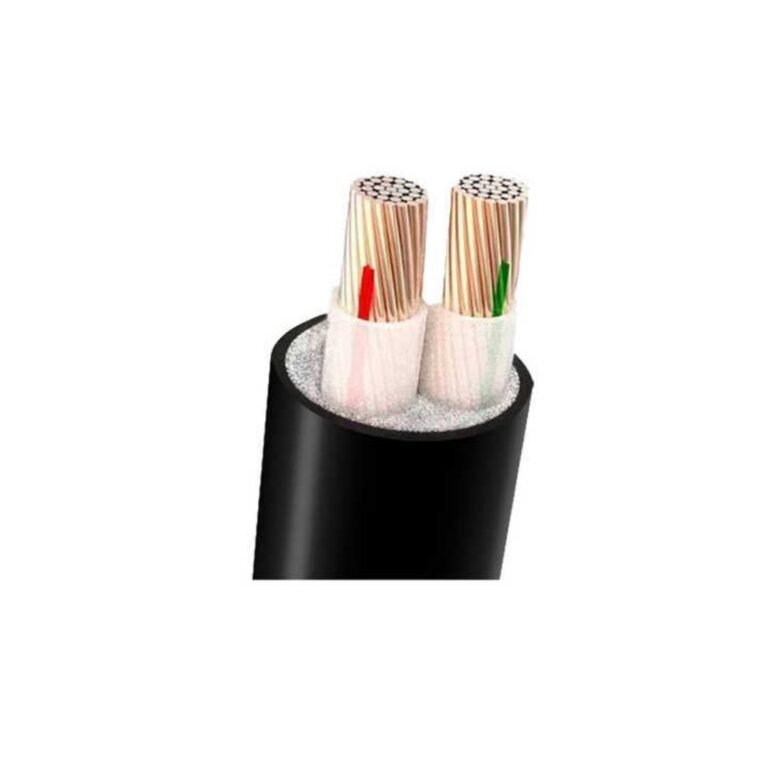
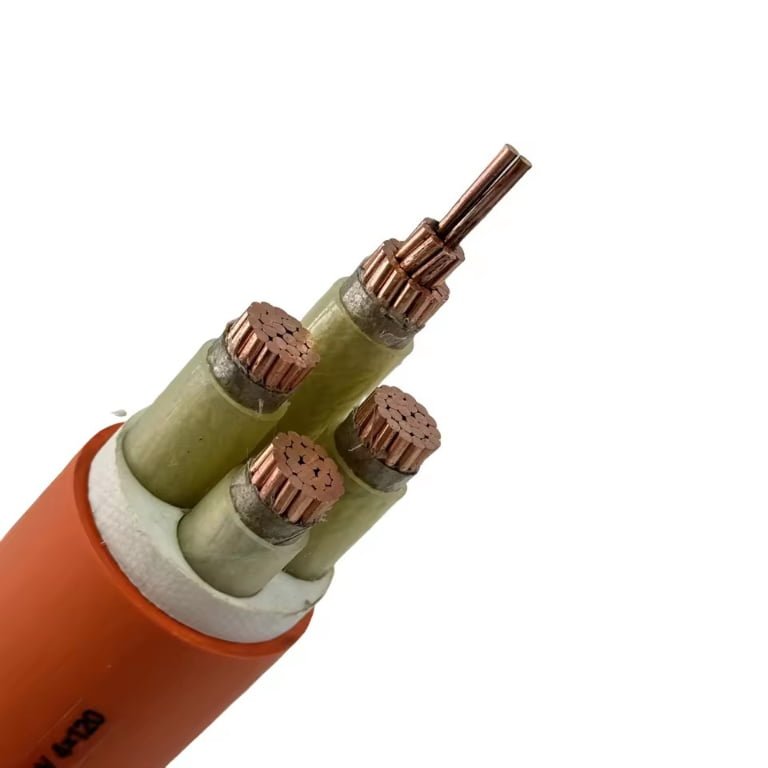
The tools get all the attention — fish tapes, flexible drill bits, borescope cameras — but the cable itself is what actually determines whether a concealed rewiring job goes smoothly or turns into a nightmare halfway through a wall cavity. Pick the wrong spec, and you’re either snapping conductors around a tight bend or grinding against a fire block until the jacket tears.
Conductor Stranding: Why It Matters More Than Most Buyers Realize
Solid conductors and coarsely stranded Class 1 or Class 2 wire are fine for straight runs in new construction where everything is open. In a retrofit, they’re a liability. Finely stranded Class 5 or Class 6 conductors — with individual wire diameters typically in the 0.16–0.40 mm range depending on overall cross-section — flex around corners without developing the stress kinking that can crack insulation inside the wall where you’ll never see it. In practice, a 2.5 mm² Class 5 stranded cable will navigate a 90-degree turn around a fire block at maybe 40–50 mm bend radius without permanent deformation. The equivalent solid conductor? It’ll hold a set and fight you every inch.
Finely stranded Class 5 or Class 6 conductors are significantly more flexible than solid or Class 1/2 conductors and less prone to kinking in tight wall cavity bends.True
IEC 60228 defines stranding classes by wire count and individual diameter; Class 5 and 6 have far more strands per cross-section than Class 1 (solid) or Class 2, resulting in measurably lower bending stiffness and fatigue resistance over repeated flexing.
Outer Diameter Tolerances Are Not a Rounding Error
A 1-inch knockout gives you roughly 25.4 mm of clearance, but between the knockout edge, any residual paint, and a bushing, effective clearance can drop to 23–24 mm. A cable specified at 14.0 mm OD that’s running at the high end of its manufacturing tolerance — say 14.5 mm — may thread through cleanly. One running at 15.2 mm because a different supplier holds a looser tolerance won’t, and you find this out after you’ve already fished 12 meters of wire. Tight OD tolerances, typically ±0.3 mm or better for well-manufactured building cables, aren’t just a quality metric. They’re an installation variable.
Jacket Material: PVC versus LSZH in Enclosed Spaces
PVC jackets remain the cost-efficient standard for residential work in many jurisdictions, and there’s nothing wrong with them where codes permit. But LSZH (low smoke, zero halogen) jackets are increasingly required — and frankly make sense — anywhere cable runs through enclosed wall cavities, plenum spaces, or multi-unit residential buildings. In a fire, burning PVC generates hydrochloric acid gas and dense black smoke. LSZH compounds suppress both. Several regional adoptions of IEC 60332 and NFPA 130 now mandate LSZH in specific occupancy types, and this is spreading into upscale residential specifications faster than most installers expect. The tradeoff is cost — LSZH jackets typically run 20–40% higher in material cost than standard PVC, depending on compound formulation — and slightly higher stiffness at low temperatures, which matters if you’re pulling cable in an unheated structure in January.
Temperature Ratings and NEC Ampacity Derating
Cables routed through insulated wall cavities don’t dissipate heat the way open-air or conduit runs do. A 60°C-rated conductor in a dense-pack cellulose cavity can hit its thermal limit under sustained load at amperages that would be perfectly safe in free air. NEC Table 310.15(B)(3)(a) requires ampacity derating when multiple current-carrying conductors share a conduit or raceway — and in a retrofit situation where you’re fishing multiple circuits through the same pathway, this compounds quickly. Specifying 90°C-rated conductors (THHN/THWN-2 in North America, or equivalent under IEC 60502) gives you the thermal headroom to derate back to a usable ampacity without undersizing the circuit. It’s basic derating math, but it gets skipped on retrofit jobs more often than it should.
Bend Radius and Pull Force: The Two Numbers to Check Before You Order
Most manufacturers publish a minimum bend radius as a multiple of cable OD — typically 4x to 6x for flexible power cables, sometimes tighter for specialized control cables. A cable with a 6x OD minimum bend radius at 14 mm OD needs at least 84 mm of clearance to turn. That’s fine for a sweep around a wall stud. It’s marginal if you’re navigating a stacked corner near a top plate. Cables rated for 4x OD give you real latitude in tight retrofit geometry.
Pull force limits matter on long horizontal runs — anything past 15–20 meters where friction accumulates. Wire pulling gel or soap-based lubricants can reduce jacket friction by 30–50% depending on surface texture and cavity cleanliness, and they won’t degrade PVC or LSZH jackets if you use compounds formulated for the purpose. Petroleum-based lubricants are a different story; they attack PVC plasticizers over time.
Procurement Considerations for Large Retrofit Projects
For a single house, you order what the supply house stocks. For multi-unit residential renovation projects or commercial retrofits — where you might be procuring 10,000–50,000 meters of building wire at once — cable specifications become a procurement discipline, not just a technical footnote. Consistency of OD tolerance across reels, availability in both IEC and UL-compliant variants for projects that cross regulatory jurisdictions, and the ability to source LSZH flexible cable in non-standard cross-sections without a 16-week lead time are the variables that separate a smooth project from a materials headache.
Jinda produces flexible power cables, control cables, and building wire to IEC, UL, and BS standards across its five production bases, with manufacturing capacity suited to large retrofit procurement volumes where specification consistency reel-to-reel is critical. For international projects where local code compliance and tight OD tolerances both need to be guaranteed in writing — not just estimated — that kind of integrated R&D-to-production traceability is worth asking about early in the procurement conversation.
Code Compliance and Permit Requirements for Concealed Rewiring in Major Markets
Regulatory requirements are where a lot of homeowners — and frankly some contractors — get caught out. The physical challenge of fishing wire through finished walls gets most of the attention, but an unpermitted concealed rewire can void a homeowner’s insurance policy, trigger a failed inspection at resale, and in some jurisdictions expose the contractor to personal liability. That’s not hypothetical. It happens.
NEC (NFPA 70) Requirements in the United States
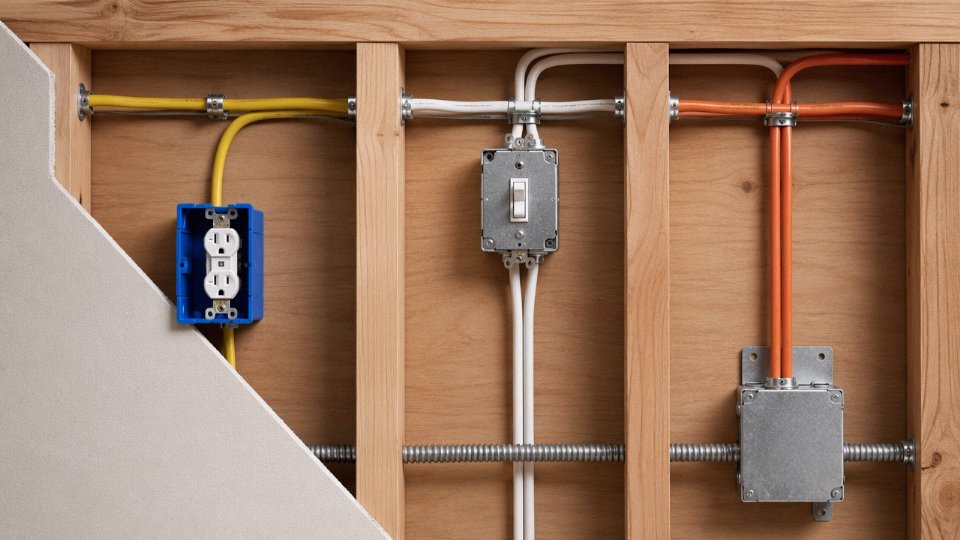
Under the National Electrical Code, the permitted wiring methods for concealed residential spaces depend on the specific location within the structure. NM-B (non-metallic sheathed cable, the ubiquitous “Romex”) is permitted in concealed wall cavities in wood-frame construction — but it cannot be used in conduit, in wet or damp locations, or embedded in concrete. For steel-stud construction or where mechanical protection is needed, MC (metal-clad) or AC (armored cable) are the appropriate choices. EMT (electrical metallic tubing) is allowed but rarely practical for retrofit fishing work given its rigid nature; FMC (flexible metal conduit) and ENT (electrical nonmetallic tubing, the corrugated blue flex) are far more useful in concealed retrofit scenarios because they bend around obstructions.
The requirement that catches people: any newly installed or replaced circuit must comply with current AFCI and GFCI rules, regardless of whether it’s a full rewire or a single added circuit. In most jurisdictions following NEC 2020 or 2023, AFCI protection is required for virtually all bedroom, living room, hallway, and kitchen circuits. GFCI protection applies to bathrooms, kitchens within 6 feet of a sink, garages, outdoors, unfinished basements, and crawlspaces. This means that fishing a single new circuit from an existing panel can require new breaker hardware — budget accordingly.
One important nuance: some jurisdictions distinguish between “adding circuits to an existing panel” and “service replacement.” The former often qualifies for a limited inspection scope, which reduces both permit fees and inspection visits. Fees vary widely — roughly $50–$250 for a simple circuit addition, up to $400–$800 or more for a full-house rewire permit, depending on the municipality and project valuation.
BS 7671 (18th Edition) in the United Kingdom
The UK’s wiring regulations take a different approach. BS 7671 defines prescribed cable routing zones — essentially safe zones running vertically and horizontally from outlets, switches, and service positions — where cables can be run concealed without requiring additional mechanical protection. Route a cable outside those zones and you need either a metal conduit or RCD protection on that circuit. In practice, most competent electricians stick to the zones and use 30mA RCD protection as a belt-and-braces measure anyway.
Part P of the Building Regulations requires that most electrical work in dwellings be either carried out by a registered competent person (self-certifying under schemes like NICEIC or NAPIT) or notified to the local building authority. A full rewire of an occupied dwelling almost always requires notification. Skipping this isn’t just a technicality — it creates a genuine problem at the point of sale, when solicitors ask for electrical installation certificates.
IEC 60364 and International Markets
IEC 60364 is a single universal electrical code that all countries must follow.False
IEC 60364 is a reference framework standard, not a mandatory code. Individual countries adopt it with national amendments — Germany uses DIN VDE 0100, Australia uses AS/NZS 3000, Gulf states often use a mix of IEC 60364 and local authority overlays. Compliance always means checking the adopted national variant, not the base IEC document.
For projects across Europe, the Middle East, Southeast Asia, and Africa — markets where cables manufactured to IEC standards are the default expectation — IEC 60364-5-52 governs cable selection and installation methods in concealed spaces. The standard addresses current-carrying capacity correction factors for bundled cables in insulated walls, which is directly relevant when fishing multiple circuits through the same cavity. Ignoring those derating factors in a dense retrofit is a genuine thermal risk, not a paperwork issue.
Why the Permit Actually Protects You
Pulling an electrical permit before concealed work begins creates a documented inspection trail. Insurance adjusters, mortgage underwriters, and home inspectors all look for this. An unpermitted rewire discovered during a home sale can require either full disclosure, re-inspection, or in the worst case, partial drywall removal to verify the work — which defeats the entire purpose of the concealed approach. The permit fee is cheap insurance against that outcome. In most US states, the inspection itself is the mechanism that confirms AFCI/GFCI compliance and correct cable type, so it’s also the contractor’s protection if a fault occurs later.
Smart Home Retrofit and Low-Voltage Wiring: Where Wireless Systems Reduce the Need for New Cable
Not every function you want to add to an older home requires pulling new 12-gauge wire through finished walls. That distinction matters a lot when you’re staring at a 1960s ranch house with blown-in cellulose insulation packed into every cavity.
Smart Switches and Mesh Protocols Can Handle More Than Most Homeowners Realize
Zigbee and Z-Wave mesh devices — smart switches, plug-in modules, dimmer retrofits — sit on existing circuits and talk to each other without any new high-voltage wiring. A 20-node Zigbee mesh covering a 2,400 sq ft house typically needs nothing more than a hub, a handful of plug-in repeaters, and whoever is replacing the switches. The switches swap into existing boxes. No fishing, no access holes, no drywall repair.
In practice, this works well for lighting control, outlet switching, and basic load monitoring. The electrician’s scope shrinks considerably — you’re looking at maybe a day of device installation rather than a week of wall work. For older homes where concealed routing is genuinely difficult (think plaster over metal lath, or fire-blocked balloon framing), this wireless layer is not a compromise. It’s often the right answer for those circuits.
Zigbee and Z-Wave smart switches can add full lighting automation to existing circuits without running any new line-voltage cableTrue
Both protocols operate on existing circuits via neutral-wire or no-neutral smart switch configurations. The communication layer is entirely wireless; no new 120V or 240V conductors are required for the control function itself.
Power over Ethernet Replaces More Specialty Cable Than You’d Expect
PoE is underused in residential retrofit. A single Cat6 cable — which is thin, flexible, and fishes through wall cavities with relative ease — can simultaneously power and communicate with IP cameras, doorbell systems, access control readers, occupancy sensors, and increasingly, LED luminaires designed for 802.3bt (PoE++) delivery. One cable replaces what used to be a combination of coax, low-voltage control wire, and a separate power feed.
Cat6 is also forgiving to install. The bend radius is manageable, the jacket is slim, and unlike armored power cable, it doesn’t fight you around corners. For a camera system or a distributed audio retrofit, routing Cat6 from a central panel location to each endpoint is almost always faster and less destructive than the multi-cable alternative.
Central Structured Wiring Panels: Plan Once, Disrupt Once
If a house is getting any wall work done — a kitchen renovation, a bathroom gut, anything that opens cavities — that is the moment to rough in home-run conduit or at minimum to pull a few extra Cat6 home runs to a central distribution panel. The incremental cost during open construction is modest. The cost of doing it later, through finished walls, is not.
A structured panel approach means future adds — a new camera, a doorbell, an additional access point — terminate at one location. The wall stays closed.
Where Wireless Absolutely Cannot Help You
This is worth being direct about. HVAC units, EV chargers, electric ranges, heat pump water heaters, and any other high-current dedicated circuit cannot be served by wireless control technology alone. A 240V, 50A EV charger circuit requires copper. A wireless switch can control it, but the wire still has to get there. No mesh protocol changes that physics.
The Hybrid Approach — and Why Sourcing Matters
Commercial retrofit projects have used this model for years: a minimal new copper infrastructure for power-hungry loads, overlaid with a wireless or PoE control layer that handles everything else. It reduces both material quantity and the disruption that comes from fishing wire. For a residential project, the same logic applies.
For international projects or any bulk procurement scenario, sourcing power cables and low-voltage data cables — Cat6, control cable, LSZH-jacketed flexible wiring — from a single manufacturer like Jinda simplifies the certification chain considerably. You get consistent documentation, matched jacket ratings, and a single point of contact for compliance questions across cable types. When a project spans multiple countries, that consolidation is not a minor convenience.
Real-World Cost Breakdown: What You Actually Pay for a No-Drywall Rewire vs. Full Open-Wall Rewire
The numbers vary more than most online estimates suggest, and the gap between a concealed rewire and a full open-wall job isn’t always what homeowners expect. The drywall savings are real — but so is the labor premium for fishing wire through finished cavities.
What the Tiers Actually Look Like
Here’s a working reference table for three common project scopes, with regional benchmarks. These are ranges drawn from typical residential projects; actual figures shift based on home age, panel location, wall construction, and local labor markets.
| Scope | US (USD) | UK (GBP) | Australia (AUD) |
|---|---|---|---|
| Partial rewire — 5–10 new circuits, no panel upgrade, concealed | $4,500–$9,000 | £3,000–£6,500 | A$7,000–$13,000 |
| Full-house rewire — all circuits, new 200A panel, concealed where possible | $8,000–$15,000 | £6,000–£12,000 | A$14,000–$25,000 |
| Full-house rewire + smart home integration (low-voltage, Cat6, lighting control) | $14,000–$28,000 | £10,000–£20,000 | A$22,000–$40,000 |
| Full open-wall rewire (drywall removed, all circuits) | $20,000–$30,000+ | £14,000–£24,000 | A$28,000–$45,000+ |
UK pricing assumes a 3-bedroom semi-detached. Australian figures reflect Sydney/Melbourne labor rates; regional Queensland or Western Australia jobs typically run 10–20% lower.
Where the Money Actually Goes
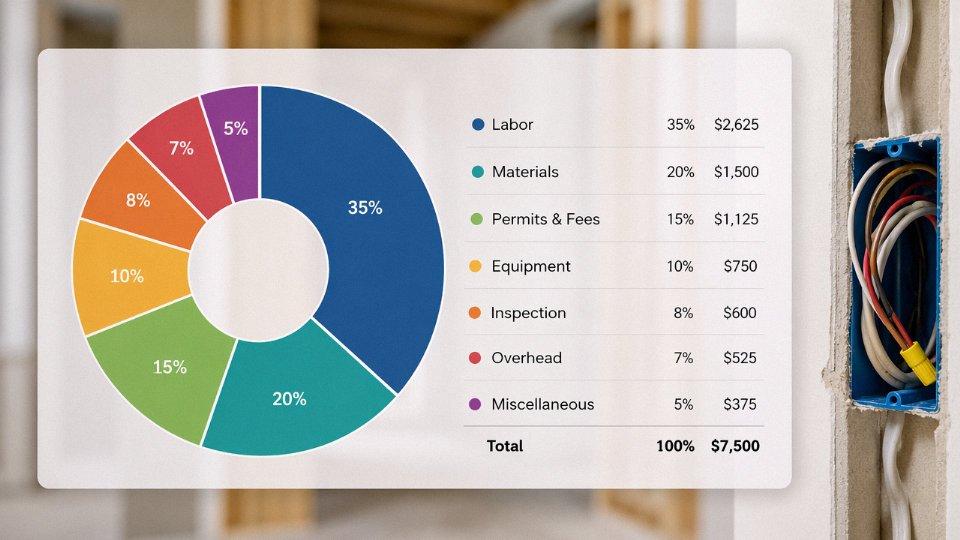
Labor is the dominant cost — usually 40–60% of the total, depending on regional rates and job complexity. Cable and materials run 15–25%. Permits and inspections add another 5–10% and are non-negotiable in most jurisdictions; skipping them is how you create a liability problem at resale. Drywall repair, mud, tape, primer, and painting can consume 10–20% of an open-wall project budget — easily $3,000–$8,000 on a typical 2,000 sq ft home once a proper paint-match is attempted. On a concealed rewire, that line item drops to near zero, which is the core financial argument for the approach.
The catch is that concealed fishing work runs 20–35% more in labor per linear foot of cable routed. An electrician spending two hours carefully drilling, fishing, and pulling a single circuit through a finished wall is slower than one working in an open stud bay. That premium is real. It just gets more than offset by the elimination of the finish trade costs — unless the home’s framing genuinely resists the fish tape, at which point small access holes multiply and the labor gap narrows.
When Bulk Cable Procurement Changes the Math
For a single-family home, cable material cost is a secondary concern. For large apartment complexes, hotel renovations, or multi-unit residential developments — the calculation shifts substantially. On a 200-unit apartment retrofit, cable material alone can represent $50,000–$500,000 of project budget depending on specification (standard NM-B versus LSZH flexible cable for high-rise applications). At that scale, sourcing from a high-volume international manufacturer rather than a domestic distributor can reduce material cost by 15–30%, depending on volume, lead time tolerance, and logistics setup. That range depends heavily on whether the spec calls for a commodity cable type or something with specific fire-performance or flexibility requirements.
Sourcing cable internationally for large multi-unit rewiring projects can reduce material costs versus domestic distributor pricingTrue
High-volume cable manufacturers operating at scale — particularly those with integrated production across extrusion, stranding, and jacketing — carry significantly lower per-unit costs than regional distributors, who add margin at each tier. The savings are real for large projects but generally don't justify the logistics complexity for single-home jobs.
The ROI Case for Doing It Right
A properly permitted and documented rewire — with the inspection record attached to the property file — does three concrete things at resale. It satisfies home inspector findings before they become negotiating leverage for a buyer. It meets lender requirements in markets where 60-amp or aluminum branch-circuit wiring triggers financing conditions. And in some markets, updated wiring documentation supports a measurable reduction in homeowner’s insurance premiums; the exact figure depends on the insurer and the previous installation’s age and type, but $100–$400 per year is a realistic range for homes coming off knob-and-tube or ungrounded systems.
Before You Sign a Rewiring Contract
Ask these questions before committing:
- What cable specification will you use — NM-B, THHN in conduit, or LSZH? Why?
- How many access points do you anticipate, and where?
- Who pulls the permit and schedules inspections — you or me?
- What’s your process if a cavity turns out to be blocked mid-run?
- What warranty covers both the installation labor and the materials supplied?
- Will you provide an as-built circuit directory at completion?
That last one gets skipped more often than it should. An undocumented panel is a problem for every electrician who works on that house afterward.
Step-by-Step Project Planning Guide for Homeowners and General Contractors
A rewire project that goes sideways almost always traces back to poor sequencing, not poor craftsmanship. Electricians who skip the planning phase end up cutting access holes in the wrong places, ordering the wrong wire gauges, or discovering mid-job that the panel can’t support what the client wants. The steps below are ordered the way experienced contractors actually run these jobs — not the way a textbook would describe them.
Step 1: Conduct a Proper Electrical Audit Before Touching Anything
Start with the panel. Document every breaker, its rated amperage, and what’s on it. Identify any aluminum branch-circuit wiring, knob-and-tube, or early-generation two-wire NM cable without a ground — these aren’t just inconveniences, they’re code violations in most jurisdictions and will affect your permit. Use a clamp meter to record actual load on circuits under normal household operation. A panel that looks adequate on paper often has three or four circuits already running near 80% of their rated capacity during peak hours, which changes the whole conversation about whether you’re adding circuits or replacing them.
Photograph the existing panel schedule, every outlet and switch location, and any visible cable routing in the attic or basement. This documentation is your baseline and your insurance if an inspector asks questions later.
Step 2: Build a Scaled Floor Plan with Access Points Marked
Graph paper or a free tool like RoomSketcher works fine. The key is to mark not just where you want devices but where the cable can realistically reach them — and that means identifying every viable access point: attic joists, basement sill plates, crawl space knee walls. Top-down runs through an attic are almost always easier than bottom-up from a tight basement; factor that in early. Mark every interior wall that is platform-framed versus balloon-framed, because balloon-framed walls run the full height of the structure and require firestopping that adds labor and material.
Step 3: Generate a Cable Schedule and Procure Accordingly
Don’t estimate wire by the spool. Write an actual cable schedule: conductor size (12 AWG, 10 AWG, etc.), insulation type (standard NM-B, LSZH for any plenum or sensitive-environment runs), run length with a 10–15% overage for routing complexity, and circuit count. A 2,000 sq ft home partial rewire typically needs somewhere between 800 and 1,400 linear feet of NM-B cable across all circuits — the range is wide because it depends heavily on panel location relative to the house footprint.
For commercial or multi-unit projects, request third-party test certificates and full technical data sheets from your supplier before committing to a purchase order. Delivery sequencing matters on phased jobs; a manufacturer with staged-delivery capability prevents material from sitting on-site for weeks, which is a real theft and damage risk.
LSZH cable reduces installation time compared to rigid conduit in retrofit scenariosTrue
LSZH cables are more flexible and easier to pull through existing cavities and tight bends, and they eliminate the need for conduit bending and fitting assembly, which is where most retrofit labor hours accumulate. Time savings of 15–25% are realistic depending on run complexity and installer experience.
Step 4: Pull Permits Before Anything Gets Opened Up
Submit to your AHJ with the floor plan, panel schedule, and circuit description. Schedule rough-in and final inspections at the same time if the office allows it — some jurisdictions book inspectors weeks out. Unpermitted work creates title problems on resale and voids homeowner’s insurance coverage in many states. This step is non-negotiable.
Step 5: Execute Runs in Logical Sequence
Start with the longest and most structurally complex runs. Finish those before touching anything easier. Test continuity on each circuit with a simple tone tester before you seal anything up — catching an open circuit at this stage costs minutes; catching it after the access holes are patched costs hours. Photograph every concealed cable path with a timestamp before closing. Your future self, and the next electrician to work on this house, will appreciate it.
Step 6: Device Installation, Load Testing, and Final Inspection
Install receptacles, switches, and fixtures. Then test every circuit under actual load — not just a voltage check, but energize it with the expected devices running. Verify AFCI protection is tripping correctly on bedroom circuits and GFCI on any wet-location circuits. Don’t close remaining access points until the final inspection is signed off. Patching two small holes after an inspection is cheap. Reopening a patched wall because an inspector flagged something is expensive and annoying.
Step 7: Procurement Planning for Larger Projects
On commercial or multi-family jobs, align your cable purchase order with installation phases. Order phase-one material only when phase-one scope is locked. Specify exact reel lengths where possible — field-cut waste on a large project adds up faster than most project managers expect, and returning partial reels is rarely economical. A manufacturer that can provide staged delivery, material certifications, and responsive technical support will save more money over the project life than one that simply quotes the lowest unit price.
Frequently Asked Questions About Rewiring Without Removing Drywall
Can I rewire my house myself without removing drywall, or do I need a licensed electrician?
For high-voltage work — new circuits, panel upgrades, replacing branch wiring — virtually every US state requires a licensed electrician, and most will also require a permit with inspection. That’s not bureaucratic noise; an improperly terminated splice inside a wall cavity is exactly the kind of fault that smolders undetected for months. Low-voltage work is a different story. Fishing your own Cat6 or RG6 coax is generally DIY-legal in most jurisdictions, and plenty of homeowners do it on weekends with a fish tape and a borrowed drill. But the moment you’re touching the panel, adding a circuit breaker, or replacing NM-B cable, stop and call a licensed electrician. The liability exposure and safety risk simply aren’t worth the labor savings.
In most US states, homeowners must obtain an electrical permit and pass inspection for any new circuit or panel work, even on their own property.True
State electrical codes, which are typically based on the NEC, require permits and inspections for new circuit installations. Some states allow homeowner exemptions for specific minor repairs, but new circuit or panel work almost universally requires a permit and licensed contractor involvement in commercial or multi-family contexts.
How long does a full concealed house rewire take?
A two-person crew working a 2,000 sq ft single-story home will typically need somewhere between 3 and 7 days using concealed fishing methods. The range is wide because it depends heavily on wall framing type, insulation density, attic and basement access, and how many circuits need replacing. The same home with open-wall access — drywall stripped back — usually runs 2 to 4 days. So the concealed approach trades wall repair costs for additional labor hours. On older homes with dense blown-in insulation or fire blocking at every stud bay, that labor time creeps toward the high end fast.
What is the smallest access hole an electrician needs?
A standard single-gang box cutout — roughly 2 inches by 3 inches — is usually enough for both the new box and routing the cable through the cavity behind it. In practice, the real challenge isn’t the hole size; it’s knowing what’s in the cavity before you cut. A borescope camera threaded through a small exploratory hole (half-inch or so) lets an electrician check for blocking, existing cables, or unexpected insulation before committing to a larger cut. Skipping that step is how you end up with three unnecessary holes in a finished wall.
Does homeowner’s insurance cover rewiring damage to drywall?
Standard homeowner’s policies treat elective rewiring as a maintenance or improvement project — not covered. Where it gets interesting is when rewiring is required because of a covered peril: a kitchen fire, lightning strike, or storm that damages wiring. In those cases, some policies will cover both the electrical remediation and the associated drywall repair as part of restoring the home to pre-loss condition. The language varies significantly by insurer and policy tier, so get written clarification from your adjuster before the electrician starts cutting. Don’t assume.
What cable type is best for fishing through insulated walls?
In the US, flexible NM-B cable — what most people call Romex — with finely stranded conductors and a slick outer jacket pulls through insulated cavities considerably more easily than stiff solid-conductor alternatives. For international projects or markets where LSZH (low-smoke zero-halogen) compliance is required, the equivalent is a flexible LSZH-jacketed cable with a smooth, round outer profile and a small overall diameter relative to conductor cross-section. Avoid anything with a corrugated or ribbed jacket for pull-through applications; it grabs insulation fibers and makes an already frustrating job worse.
How do I know if my wiring needs full replacement rather than just supplementing?
The clearest indicators: knob-and-tube wiring anywhere in the house, aluminum branch circuit wiring installed before roughly 1972, two-prong ungrounded outlets throughout, breakers that trip without obvious overload, outlets that are warm or discolored, or a home inspection report that flags multiple violations. Any one of those conditions warrants a conversation with a licensed electrician about a full rewire. Supplementing a circuit here and there on top of fundamentally unsafe infrastructure just delays the inevitable — and can create a false sense of security.
For a large apartment or hotel renovation, what’s the most efficient way to source compliant cable in bulk?
Coordinating directly with an ISO-certified cable manufacturer that holds multi-standard certifications across IEC, UL, and CE frameworks is usually the most reliable path for large-scale retrofit procurement. What matters practically: phased delivery schedules that align with floor-by-floor installation sequences, factory test reports shipped with each reel, and a technical contact who can answer application-specific questions — not just a sales rep reading off a datasheet. Shandong Jinda Special Cable Group, with production capacity across five manufacturing bases and export experience in more than 50 countries, is structured specifically for this kind of sustained project supply, where consistency across multiple cable batches is as important as the initial price.