Aging wiring doesn’t fail on a schedule. It fails during a July heat wave when every circuit is loaded, or in the middle of the night when nobody’s watching the panel. For a 2,000 ft² house — a size that typically runs 15 to 25 branch circuits depending on layout and local code — the gap between “electrically functional” and “actually safe and up to current NEC standards” can be wider than most owners expect. Ignore it long enough and you’re looking at tripped breakers that won’t reset, insurance carriers who won’t renew, or worse, an arc fault behind a wall that a smoke detector catches too late.
Rewiring a 2,000 ft² house in the US typically costs $8,000 to $15,000 all-in, with most jobs landing near $10,500. Labor runs $50–$100 per hour and accounts for 40–60% of total cost; copper wiring materials add roughly $2,000–$4,500 depending on gauge mix, circuit count, and what your local code requires.
What actually moves that number up or down isn’t the square footage — that’s just a starting frame. It’s the condition of the existing infrastructure, whether the house has plaster walls or open framing, how many circuits need to be added versus just replaced, and frankly, how hard the inspector in your jurisdiction is going to push on the finish details. All of that is worth pulling apart before anyone calls an electrician for a quote.
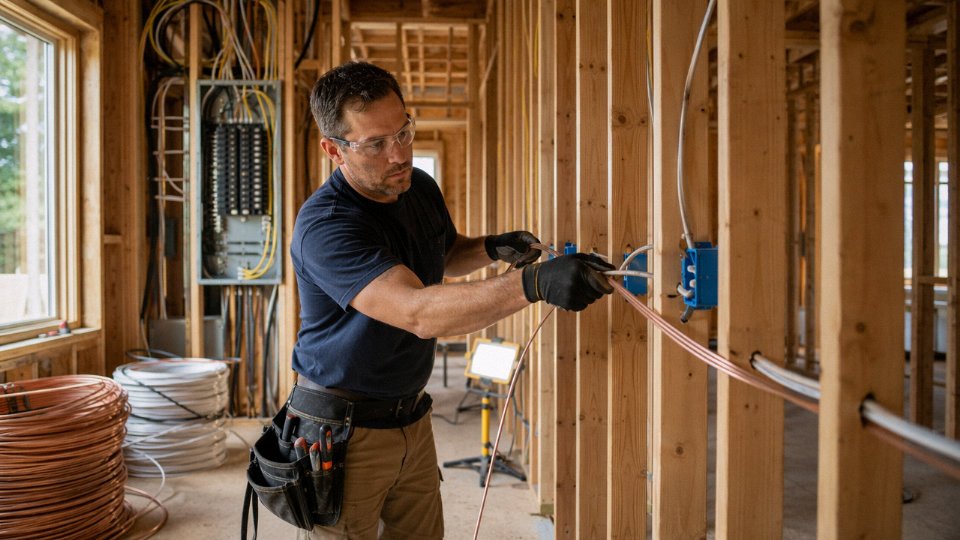
Breaking Down Every Cost Line: Labor, Materials, Permits, and Panels
A contractor’s quote can look wildly different from another’s even on the same house, and the only reliable way to evaluate it is to know what each line item should cost. Here’s where the money actually goes.
Labor: The Biggest Variable on the Invoice
Electrician hourly rates in the US run $50–$100/hr for a licensed journeyman, but that range isn’t random — it tracks tightly with region. In rural Midwest or Southeast markets, $50–$65/hr is realistic. The Pacific Coast, New York metro, and New England routinely hit $80–$100/hr, and some union shops in major cities go higher still on prevailing-wage jobs.
For a genuine full rewire of a 2,000 ft² house — new panel, all new branch circuits, outlets, switches, the works — expect 80 to 150 labor hours depending on the house’s age and construction type. A single-story slab-on-grade ranch with open basement access sits at the low end. A two-story balloon-frame house built in the 1920s with plaster walls and no accessible attic chases is a different job entirely; fishing wire through those cavities is slow, frustrating work, and the hours pile up fast.
Crew size matters too. A two-person crew (one master, one apprentice) typically runs faster overall than a solo electrician but bills at roughly 1.4–1.6× the hourly rate. On a job this size, a crew usually shortens elapsed time enough to partially offset the combined rate — though not always enough to lower total labor cost, so ask contractors to quote total hours, not just the daily rate.
Materials: Copper Wire, Hardware, and the Panel
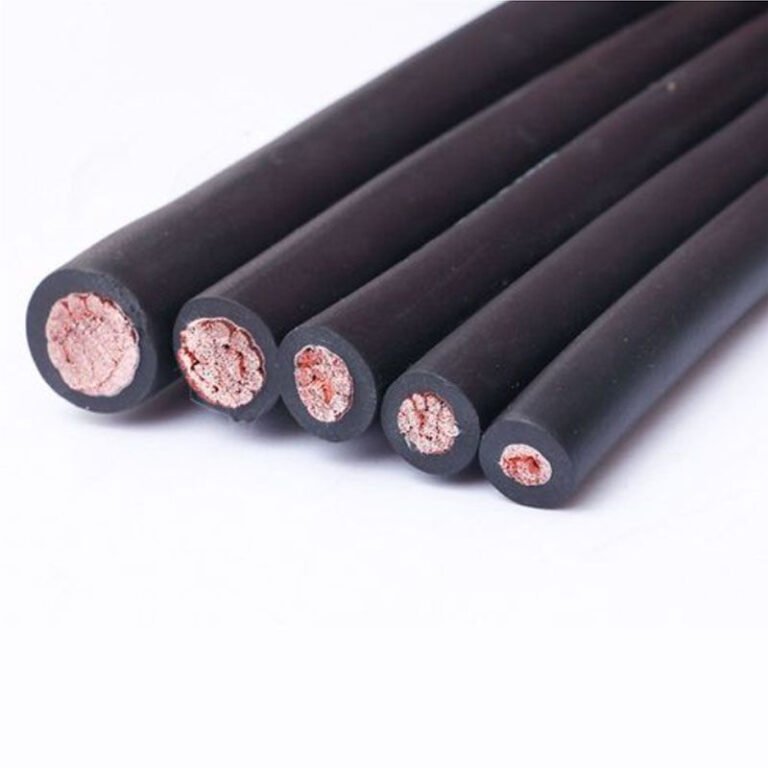
Copper wiring is the core material cost and it moves with commodity markets. For a 2,000 ft² house, total wire cost typically lands between $2,000 and $4,500 — a wide range driven by circuit count, gauge mix, and whether local code requires conduit.
14 AWG (15-amp circuits) is the baseline for general lighting and bedroom circuits. 12 AWG (20-amp) covers kitchen counters, bathrooms, and most receptacle circuits under modern NEC requirements. 10 AWG is needed for 30-amp circuits like a dryer or small HVAC circuit. In practice, a code-compliant rewire of a 2,000 ft² house might use 500–900 linear feet of 14 AWG, 400–700 feet of 12 AWG, and a smaller run of 10 AWG, though actual quantities depend heavily on the circuit layout and panel location.
Outlet and switch hardware runs $1–$5 per device for standard spec-grade items. A full rewire typically replaces 40–70 devices in a house this size. Upgrade to tamper-resistant or GFCI/AFCI combo receptacles where code requires them and that cost climbs. Junction boxes, wire connectors, staples, and miscellaneous hardware add another $300–$700 typically.
The panel itself is a significant line: a 200-amp main breaker panel with breakers installed runs $1,500–$3,500 depending on brand and breaker count. Square D QO and Eaton BR are common mid-range choices; Siemens is another. If the utility requires a service upgrade at the same time, add $800–$2,000 for that work separately.
Aluminum wiring is always unsafe and must be replaced immediately.False
Aluminum branch circuit wiring from the 1960s–70s does carry elevated risk at connections, but it can be safely managed with proper CO/ALR-rated devices and anti-oxidant compound rather than always requiring full replacement. A licensed electrician should assess the specific installation.
Permits, Inspections, and the Wall Damage Nobody Budgets For
Permit fees split into three rough tiers by state and municipality. Low-cost jurisdictions — many rural counties and smaller cities — charge $50–$200 for a residential rewire permit. Mid-tier markets, which cover a large share of suburban US, run $200–$500. High-cost states like California, Washington, and Massachusetts, especially in dense urban areas, regularly run $500–$1,200, and some jurisdictions charge per-circuit fees that add up faster than a flat rate.
The hidden cost most homeowners miss is drywall repair. In an occupied house with finished walls, electricians cut access holes to fish wire — sometimes dozens of them. Patching, retexturing, and repainting those openings can add $500–$2,500 to the project depending on wall finish type and how many penetrations the routing required. Smooth drywall is cheaper to patch than orange-peel or knockdown texture, and matching older paint is its own problem. Get a drywall allowance in the contract before work starts, not after.
How Circuit Count and Load Requirements Directly Change Your Final Quote
Square footage is a rough starting point, nothing more. Two houses both sitting at 2,000 ft² can have circuit inventories that differ by 10 or more circuits depending on how the kitchen is configured, whether the garage has an EV charger, and how many dedicated appliance loads the owner wants separated. That gap translates directly into dollars — and it’s the main reason two contractors quoting the same house can come back $4,000 apart.
What NEC Minimums Actually Require in a 2,000 ft² Home
The 2023 NEC sets a floor, not a ceiling. For a house this size, the code-minimum circuit list looks roughly like this: at least two 20 A small-appliance branch circuits feeding kitchen countertops, one dedicated refrigerator circuit, a 20 A bathroom circuit (or separate circuits if bathrooms are on different floors), dedicated 240 V circuits for the range, oven, dryer, and HVAC, plus AFCI protection on virtually every bedroom and living-area circuit and GFCI protection in bathrooms, kitchens, garages, and outdoor locations.
That alone gets you somewhere between 20 and 24 circuits on a modest, code-compliant plan. AFCI breakers run $35–$55 each versus $8–$12 for a standard breaker — a difference that adds up fast when you’re protecting eight or ten circuits.
NEC requires at least two small-appliance circuits in the kitchen of any new or rewired residential installationTrue
NEC 210.11(C)(1) mandates a minimum of two 20-ampere small-appliance branch circuits for kitchen countertop receptacles; this has been a consistent requirement across recent NEC editions.
The Circuit Inventory Table Every Homeowner Should Ask For
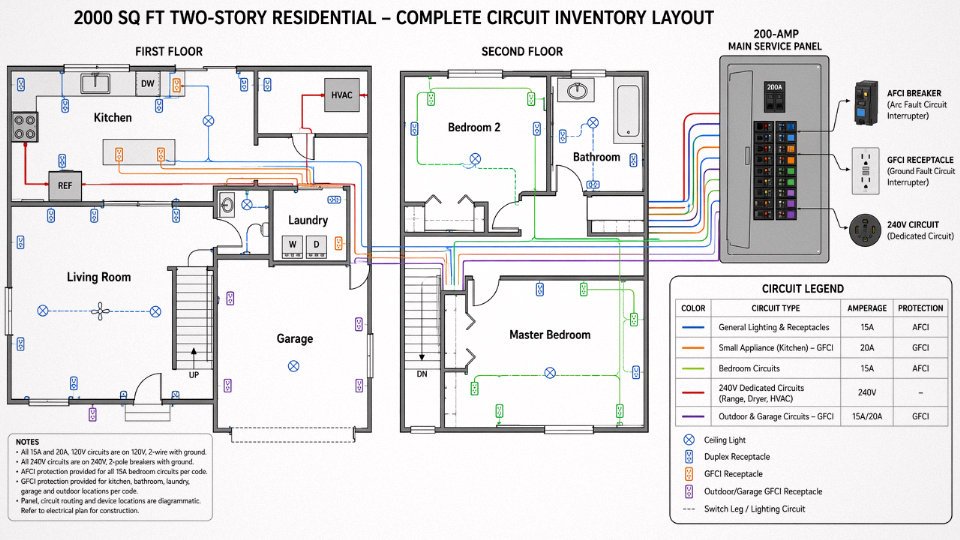
A realistic circuit count for a full rewire of a 2,000 ft² house usually lands between 20 and 30 circuits. Here’s a representative breakdown:
| Circuit Type | Typical Quantity | Estimated Cost per Circuit (installed) |
|---|---|---|
| General lighting / receptacle (15 A) | 6–8 | $200–$320 |
| Small appliance, kitchen (20 A GFCI) | 2–3 | $250–$380 |
| Dedicated 240 V — range or oven | 1 | $350–$500 |
| Dedicated 240 V — dryer | 1 | $300–$480 |
| Dedicated 240 V — HVAC / heat pump | 1–2 | $350–$500 |
| AFCI-protected bedroom circuits | 3–5 | $270–$420 |
| Bathroom GFCI circuits | 1–2 | $230–$380 |
| Garage / outdoor (GFCI) | 1–2 | $250–$400 |
Costs per circuit depend heavily on run length, whether walls are open or finished, and local labor rates. A circuit that runs 12 feet in an open basement ceiling costs nothing like one that has to snake through an insulated exterior wall on the second floor.
Where the Quote Climbs Past $15,000
The standard rewire sits in the $8,000–$15,000 range covered earlier. What pushes a job toward $18,000–$22,000 is load additions that most contractors don’t include in a baseline estimate unless you specifically ask.
An EV charger rough-in — just the 50 A, 240 V circuit and receptacle, not the charger itself — typically adds $600–$1,200 depending on panel distance and conduit requirements. If the existing panel is already near capacity, that single addition can trigger a panel upgrade to 200 A or even 320 A service, which adds $1,500–$3,500 on its own.
Home office buildouts with their own sub-panel are increasingly common, and a small 60 A sub-panel feeding a dedicated office or workshop space runs $800–$1,800 installed. Smart-home infrastructure — low-voltage wiring for lighting control, structured media panels, hardwired access points — gets billed separately by most electrical contractors, sometimes as a subcontract, and can quietly add $1,500–$4,000 to a project that started as a straightforward rewire.
The practical advice here: before you accept any quote, ask the contractor to hand you a written circuit schedule. Every circuit, its amperage, its protection type, its destination. A contractor who can’t produce that is either guessing or padding. Either way, that’s the wrong contractor.
Old Wiring Hazards That Inflate Rewiring Scope: Knob-and-Tube, Aluminum, and Cloth-Insulated Cable
If you own a home built before roughly 1975, the wiring type matters as much as the square footage when you’re trying to budget a rewire. Electricians who specialize in older homes will tell you the same thing: it’s not the new wire that costs you, it’s getting rid of what’s already in the walls. Each legacy system carries its own removal headaches, code complications, and — in some cases — insurance consequences that can dwarf the baseline material cost.
Knob-and-Tube Wiring in Pre-1950 Homes
Knob-and-tube (KT) is the system that stops conversations at home inspections. It runs as individual conductors — hot and neutral separated by several inches of open air — supported on ceramic knobs and threaded through ceramic tubes where it passes through framing. The system has no ground conductor, and that gap between conductors was the “heat dissipation” strategy of its era.
The removal cost alone typically adds $1,500–$4,000 to a rewiring project, depending on how accessible the attic and wall cavities are and how much of the house still has the original KT versus previous patchwork. Labor is the driver here, not material. Pulling old ceramic hardware out of dense old-growth framing takes time, and in balloon-frame construction — common in pre-1930 houses — fishing wire through continuous wall cavities from foundation to attic is genuinely brutal work.
Partial replacement almost never satisfies a modern inspection. Inspectors want a full system, not a hybrid. Some homeowners try to negotiate a partial pull-and-replace to save money; in practice, most AHJs (authorities having jurisdiction) won’t sign off on a permitted job that leaves active KT circuits connected to a new panel. You get it all done, or the permit stays open.
The insurance angle is real and often underestimated. Many homeowners’ insurance carriers either refuse to cover a home with active KT wiring or add a surcharge significant enough to affect the cost-benefit math on when to rewire. Get a letter from your insurer before finalizing your budget — in some cases, the insurance savings alone justify accelerating the project timeline.
Aluminum Branch-Circuit Wiring from the 1965–1973 Window
This one is less visible but arguably more dangerous. During a period when copper prices spiked sharply, aluminum was used widely for 15A and 20A branch circuits — not just for service entrance conductors, where aluminum is still standard and safe. The CPSC has documented that homes with aluminum branch-circuit wiring have a significantly elevated fire risk at connection points, primarily due to oxidation, differential thermal expansion, and the tendency of aluminum to creep under terminal pressure over time.
Aluminum branch-circuit wiring (15A/20A circuits) installed between 1965 and 1973 poses a higher fire risk than copper wiring at connection pointsTrue
The CPSC has published data confirming that homes with aluminum branch-circuit wiring are at elevated fire risk due to oxidation and thermal expansion at terminations, and recommends remediation.
Remediation comes in two forms, and the cost difference is substantial. Full replacement with copper wiring runs $3,000–$7,000 over the baseline rewiring cost for a 2,000 ft² house, depending on how much aluminum branch wiring is present and how accessible the runs are. The alternative — installing CO/ALR-rated devices (outlets, switches, and connectors designed for aluminum-to-copper transitions) at every termination point — costs less upfront, usually $800–$2,500 for a typical house, but requires finding every single connection and using listed pigtail connectors or COPALUM crimping tools. COPALUM crimping specifically requires a trained and approved contractor; not every electrician carries that certification or equipment. Full replacement is cleaner long-term. The CO/ALR route is reasonable if budget is genuinely constrained, but only if every termination gets addressed — a partial fix here is worse than none because it creates a false sense of completion.
Cloth-Insulated and Rubber-Sheathed Wire
Homes from roughly 1930 to the late 1960s often have rubber-insulated conductors wrapped in cloth braid — sometimes treated with lacquer, sometimes not. The rubber deteriorates over decades, becoming brittle and cracking away from the conductor. You don’t always see this until someone opens a junction box or pulls a device off the wall and finds the insulation crumbling at the touch.
Assessment is straightforward for an experienced electrician: open a sampling of outlets and boxes throughout the house, flex the wire gently, and look at the condition of the insulation at stress points near staples and bends. If it’s flaking in three out of five boxes you open, assume the whole system is compromised. Spot-checking is worth doing before finalizing scope.
The asbestos issue can surface here and deserves a direct mention. Pre-1980 homes — particularly those with older cloth wiring still in place — sometimes have asbestos-containing materials in close proximity to wiring runs: pipe insulation, duct wrap, ceiling texture, or even some older wire insulation products that contained asbestos fiber as a heat retardant. If your electrician opens a wall and encounters suspect friable material, work stops until an abatement assessment is done. Asbestos abatement is priced separately from electrical work and typically runs $1,500–$5,000 depending on scope and location, occasionally more in tight spaces. It’s not common, but it’s common enough in pre-1960 homes that you should build contingency into your budget — 10–15% is reasonable — rather than assuming a clean pull.
Wire Specification Guide: Choosing the Right Cable Type, Gauge, and Insulation Rating
Getting the circuit count right matters, but specifying the wrong cable type or gauge will cost you more in the long run — either through a failed inspection, a nuisance breaker trip, or in a worst case, a fire. This is where a lot of homeowners (and some contractors, frankly) leave money on the table by treating wire as a commodity rather than an engineered component.
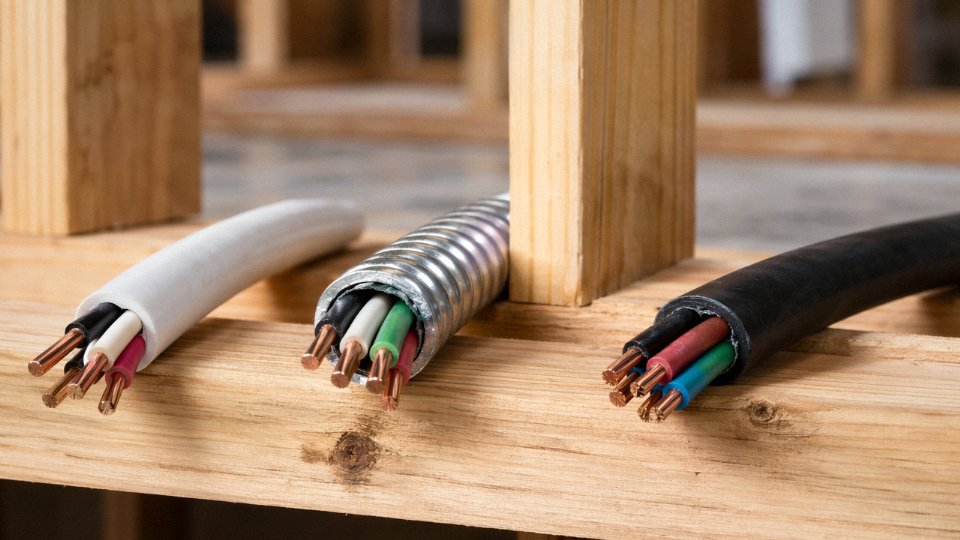
NM-B, MC Cable, and THHN/THWN: Which Belongs Where
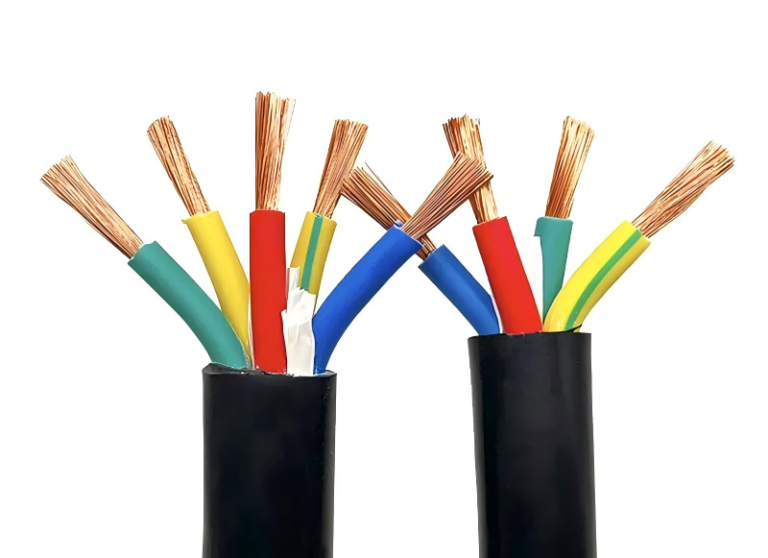
NM-B — the stuff most people call Romex, though that’s a brand name — is the standard for dry, interior residential wiring across most of the US. It’s the cheapest option per foot, typically running $0.25–$0.70/ft for 12 AWG depending on copper market prices and supplier volume, and it installs fast. The limitation is that NEC and most local amendments prohibit NM-B in wet locations, exposed runs in garages, or commercial occupancies. For a typical 2,000 ft² house being fully rewired, the vast majority of branch circuits will use NM-B, and that’s perfectly appropriate.
MC cable (metal-clad, armored) steps in where you need mechanical protection — exposed runs in unfinished basements, panel feeds through utility spaces, or jurisdictions like Chicago that prohibit NM-B outright and mandate conduit or MC everywhere. Expect to pay $0.80–$1.80/ft for MC, and budget extra labor time because it’s slower to route and terminate. Some inspectors in the mid-Atlantic states are increasingly requiring MC in certain residential applications, so confirm local amendments before your electrician orders material.
THHN/THWN pulled through EMT or PVC conduit is the most flexible long-term option — you can pull new conductors without tearing into walls if you need to upgrade later. It costs more upfront in both material and labor (conduit, fittings, pull boxes all add up), but for any run that might see moisture, any exterior-adjacent chase, or any commercial-adjacent residential project, it’s the right call. THWN-2 is rated for wet locations and 90°C, which gives you derating headroom when bundling conductors.
Gauge, Ampacity, and What Under-Gauging Actually Costs You
The relationships here aren’t negotiable — they’re physics. 14 AWG handles 15 A circuits (general lighting, most bedroom outlets). 12 AWG is your 20 A workhorse: kitchens, bathrooms, laundry. 10 AWG covers 30 A circuits like dryer feeds and some HVAC equipment. Step up to 8 AWG for 40 A loads (electric ranges, larger heat pumps), and 6 AWG for 55 A — think large EV charger circuits or hot tub feeds.
Under-gauge a circuit and you’re not just risking a tripped breaker. Sustained overload on undersized wire generates heat at the conductor, degrades insulation over years, and can ignite surrounding material long before the breaker responds — especially if someone has swapped in an oversized breaker, which happens more often than it should.
Running 14 AWG wire on a 20-amp circuit breaker is a code violation under NEC 210.19.True
NEC 210.19(A) requires conductor ampacity to match the circuit's overcurrent protection rating. A 14 AWG conductor is rated for 15 A under standard conditions; connecting it to a 20 A breaker means the breaker will not trip before the wire is overloaded, creating a genuine fire hazard.
In practice, the cost difference between 14 AWG and 12 AWG NM-B across an entire house rewire is roughly $300–$600 in material. Most experienced electricians will default to 12 AWG for virtually all branch circuits just to eliminate callbacks and future liability. Worth it.
Low-Smoke, Halogen-Free, and Fire-Resistant Cable: Where the Spec Is Heading
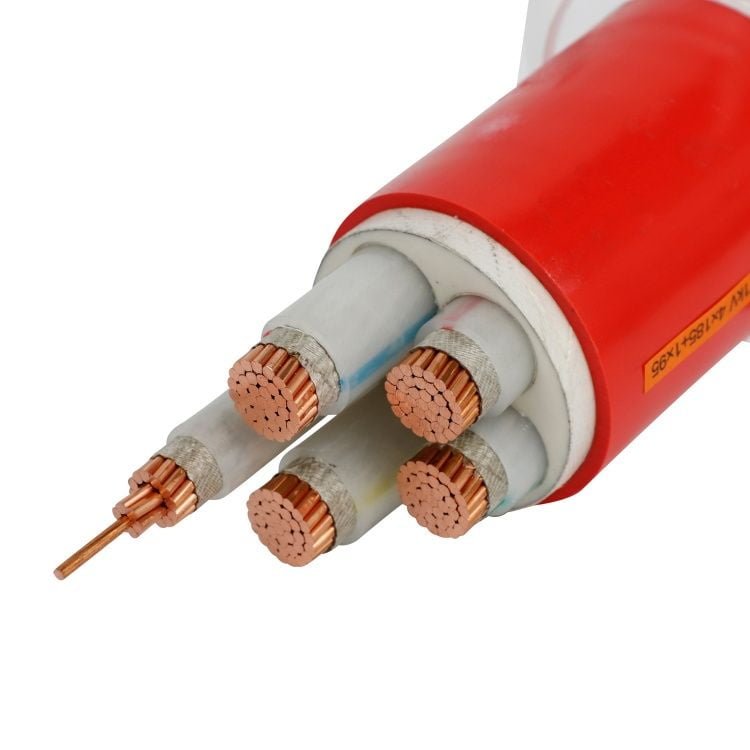
High-end residential builds — think large custom homes, mixed-use developments, or anything with a fire-rated assembly requirement — are increasingly specifying LSZH (low-smoke, zero-halogen) cable alongside fire-resistant variants. The reasoning is straightforward: in a fire, standard PVC insulation releases hydrogen chloride gas, which is toxic and corrosive to electronics. LSZH compounds limit smoke density and halogen emission, measurably improving evacuation conditions and reducing secondary damage.
The relevant international benchmarks are IEC 60332-1 and IEC 60332-3 (flame propagation for single cables and bundles, respectively), plus UL 1685 for vertical tray flame testing in the North American market. These standards aren’t typical for basic NM-B residential work, but they’re standard spec on international residential projects, high-rise residential towers, and export-market construction — and that’s where cable quality at the supply level matters enormously.
Jinda’s export-grade residential cables are manufactured to meet IEC 60332 series requirements alongside UL listing compliance, which positions them for bulk project supply on international residential developments where both North American and IEC standards may apply simultaneously. For procurement managers sourcing cable for large-scale residential or mixed-use projects outside the US, this dual-compliance matters — it reduces the risk of a specification conflict midproject when local inspectors pull out both a UL listing card and an IEC test report.
Domestically, if you’re rewiring a custom home and the architect has specified LSZH cable anywhere — usually in plenum spaces or home theater chases — verify that your electrical contractor’s material quote actually reflects that spec. Substituting standard NM-B in a plenum application is both a code violation and a liability issue.
DIY vs. Licensed Electrician: Legal Boundaries, Safety Risks, and Real Cost Savings
The savings are real. On a full 2,000 ft² rewire, pulling your own permit and supplying your own labor can cut the total bill by roughly 40–55% — that’s somewhere between $3,500 and $7,000 depending on your circuit count, local permit fees, and how much of the rough-in you can actually complete without calling someone back in to fix it. But the legal picture is messier than most DIY forums admit, and the financial downside of getting it wrong can dwarf whatever you saved on labor.
What the Law Actually Says by Jurisdiction
There is no single federal rule. Electrical work falls under state and local authority, and the variation is significant. A handful of states — Kansas, Missouri, and parts of rural Texas among them — allow licensed homeowners to pull permits and perform their own wiring on their primary residence, provided the work passes inspection. Several others allow it only for single-family detached homes, not condos or rental properties. Then there are jurisdictions like California, New York, and Massachusetts where any new circuit installation or panel work legally requires a licensed electrical contractor, full stop. No exception for owner-occupants.
Before you buy a single roll of Romex, call your local building department — not the county website, which is often outdated — and ask specifically whether an owner-occupant can pull an electrical permit for a full rewire. Get the answer in writing if you can. Inspectors have seen homeowners show up with half a house rewired under the assumption that “my neighbor did it,” only to face a stop-work order and mandatory remediation.
Where the Real Risks Live
Failed inspections are the most immediate pain point. A rough-in that doesn’t pass adds re-inspection fees (usually $75–$200 per visit, depending on the municipality) and, more expensively, your time. Stapling errors, wrong box fill calculations, missing arc-fault circuit interrupter (AFCI) protection on bedroom circuits — these are the things that trip up capable, experienced DIYers who just aren’t current on NEC 2020 or 2023 requirements.
The insurance exposure is less obvious but potentially catastrophic. Most homeowner policies have exclusions for unpermitted work or work that doesn’t meet code at the time of a loss. If a fire originates in a wall you rewired without a permit — or with a permit that was never inspected — your insurer has grounds to deny the claim. That risk alone, on a $400,000 home, makes the $4,000 in labor savings look different.
Homeowners who perform their own electrical work without a permit may have fire-related insurance claims denied.True
Most homeowner insurance policies exclude losses caused by unpermitted work or code violations. If a fire is traced to unpermitted wiring, insurers can and do deny claims based on policy exclusions for non-compliant work.
What a Skilled Homeowner Can Reasonably Handle
Device swap-outs — replacing outlets, switches, and fixtures on existing circuits — are generally low-risk and legal in most places without a permit, though some jurisdictions still require one. Adding a single outlet to an already-permitted, code-compliant circuit is another task that falls within reach of someone who’s genuinely comfortable with live work and lockout procedure.
Panel work is a different category entirely. Service entrance connections, main breaker replacement, subpanel installation — these involve utility-level voltage and fault-current levels that can kill instantly. Even in states where DIY wiring is permitted, many utilities require a licensed electrician for anything touching the service entrance. Don’t negotiate with that boundary.
New circuit runs through finished walls also tend to go sideways fast. Fish tape gets stuck, you cut into something unexpected, and suddenly a one-day job is three days and a drywall repair. In practice, most homeowners who start a full DIY rewire end up hiring an electrician to finish it — often paying more than if they’d hired out from the start, because the contractor now has to troubleshoot someone else’s partial work.
The honest split: if you’re in a permissive jurisdiction, have real experience with residential wiring, and the house is unoccupied during work, DIY on the rough-in wiring is a legitimate way to save $3,000–$5,000. Otherwise, hire the licensed electrician for everything from the panel outward and do your savings hunting on material sourcing instead.
How to Get Accurate Quotes, Evaluate Contractors, and Avoid Overcharging
Getting three bids isn’t enough if all three bids are structured the same way — vague lump sums that tell you nothing about where the money actually goes. Before you contact a single electrician, understand what a professional estimate must contain, and you’ll immediately filter out the contractors who are either padding the number or cutting corners you can’t see yet.
What a Proper Electrical Estimate Looks Like
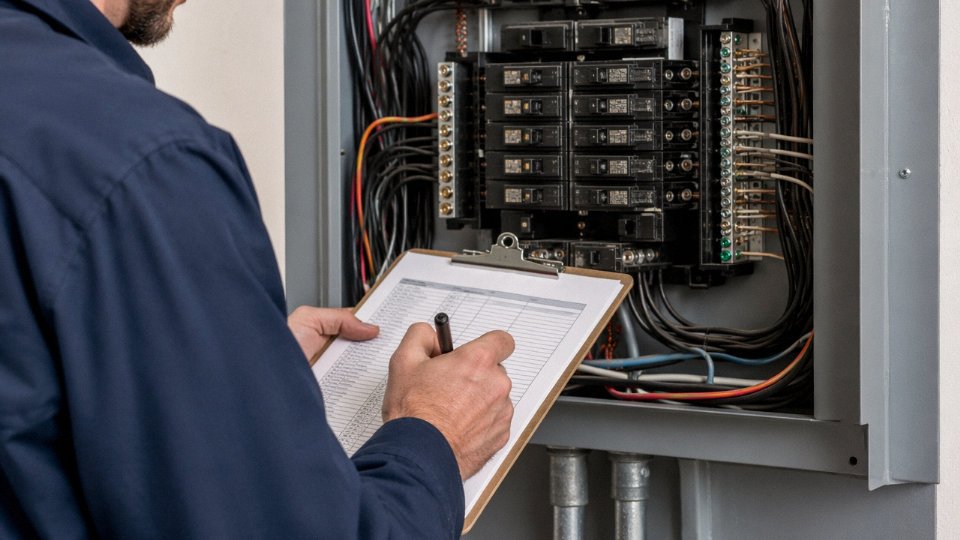
A legitimate itemized quote for a 2,000 ft² rewire should break out, at minimum: labor hours by phase (rough-in, trim-out, panel work), total wire footage by gauge — typically a mix of 14 AWG, 12 AWG, and 10 AWG depending on circuit loads — the panel brand and breaker count, a permit line item, and warranty terms on both labor and materials. If the electrician hands you a single dollar figure on a half-page form, that’s not a quote, that’s a guess with a signature on it.
Panel brand matters more than most homeowners realize. Square D QO and Eaton BR panels, for example, carry different breaker costs and availability timelines, and a contractor who leaves “panel TBD” on an estimate is leaving a real cost variable open in their favor. Ask specifically: what brand, what amperage service, how many spaces, and whether the main breaker is included. Breaker count alone can shift panel cost by $300–$700 depending on whether you’re going with a 24-space or a 40-space enclosure.
Permit allowance should appear as its own line. Electrical permits for a full rewire run roughly $150–$600 in most US jurisdictions, though some municipalities charge based on project valuation and the number can climb higher. Any contractor who says permits are “included” without specifying the amount is absorbing an unknown cost — which tends to surface later as a change order.
Red Flags That Should Stop You Cold
The single biggest warning sign is a lump-sum bid with no line items. Lump sums aren’t inherently dishonest, but without itemization you cannot verify whether the wire footage quoted matches your actual square footage and circuit count, and you cannot compare two bids side by side in any meaningful way. Demand a breakdown. If a contractor refuses, move on.
Permit refusal is worse. A contractor who offers to skip the permit is asking you to accept liability for uninspected work that could void your homeowner’s insurance, complicate a future sale, and — in a worst case — leave a fire hazard inside your walls with no third-party check. No legitimate reason exists to skip permits on a full rewire.
Material substitution is subtler. Aluminum wire on branch circuits (as opposed to service entrance conductors, where aluminum is standard and code-compliant) is a documented fire risk when terminated at devices rated for copper only. If a contractor proposes aluminum on branch circuits without explicitly disclosing it and specifying AL-rated devices throughout, that’s a problem — not just ethically but from a code compliance standpoint in most jurisdictions.
Aluminum branch circuit wiring is always unsafe and illegal.False
Aluminum is code-compliant and standard for service entrance and large feeder conductors. The hazard arises specifically from aluminum on small branch circuits (15A/20A) terminated at copper-only devices. With proper AL-rated or CO/ALR devices and correct termination torque, aluminum can be used safely, but disclosure and specification are required.
Negotiation That Actually Works
Timing has a real effect on price. Electricians in most US regions are significantly less booked from January through early March — heating season keeps HVAC contractors busy, not electricians, and new construction typically slows. Scheduling your rewire in that window can realistically yield 8–15% lower labor quotes, simply because the contractor wants to keep a crew working.
Bundling a panel upgrade with the rewire is almost always worth doing as a single mobilization. Pulling the permit, opening walls, and getting the inspector out once costs less than two separate projects, and in practice the combined job usually saves $500–$1,200 versus sequencing them separately.
Owner-furnished materials — buying your own wire, boxes, and devices directly from a distributor or a cable supplier and handing them to the electrician — can trim material costs by 10–20% compared to contractor markup, though you need to confirm the electrician will accept furnished materials and verify specs before ordering. Not every contractor will, and the ones who do will often adjust their warranty terms to exclude materials they didn’t supply. Get that in writing before you commit.
Rewiring Project Timeline: Phase-by-Phase Schedule for a 2,000 ft² Home
Most homeowners underestimate how much of a rewiring project is not the electrician pulling wire. The actual wire-running phase is often the shortest part. Plan for 2–5 weeks total elapsed time on a 2,000 ft² house, and understand that a significant chunk of that window is waiting — on the permit office, on inspection scheduling, on drywall crews — not on your electrician.
Phase 1 – Pre-Work: Permits, Load Design, and Material Lead Times
Permit timelines are the wildcard most people don’t budget for. Depending on your jurisdiction, a residential electrical permit can be issued same-week or it can take three weeks. Rural counties and smaller municipalities often run faster; dense urban building departments, especially in the Northeast and California, can sit on residential permits for 15–21 calendar days. Call your local building department before you schedule anything with a contractor — not after.
During this window, the electrician (or their estimator) should be finalizing the load calculation and circuit layout. This is more than counting outlets. A proper load calculation accounts for HVAC equipment, electric vehicle charging if applicable, kitchen appliances, and any 240V circuits for ranges, dryers, or workshops. That design drives the panel size — a 200A service is standard for a 2,000 ft² house today, though homes with heavy EV or HVAC loads sometimes warrant 320A service, which adds both panel cost and utility coordination time.
Material procurement is often overlooked at this stage. Copper pricing fluctuates, and during periods of supply tightness, certain wire gauges — particularly 10 AWG and 12 AWG THHN in bulk quantities — can have lead times of 1–2 weeks from electrical distributors. A contractor who orders material the day before rough-in starts is a contractor who may be stalling your job when something is backordered. Ask them when they’re placing the material order.
Rewiring permit timelines range from 3 to 21 days depending on jurisdictionTrue
Municipal building departments vary widely in processing speed; this range reflects documented variation between rural counties and high-volume urban building departments in the US.
Phase 2 – Rough-In: Demo, Wire Runs, and Panel Work
With permits in hand, a competent 2-person crew on a 2,000 ft² house typically completes rough-in in 3–7 working days. The range depends on construction type — an open-framed addition is easy; a fully finished plaster-wall 1940s colonial is not. Fishing wire through fire blocking and around insulation eats time fast.
This phase includes selectively opening drywall (or plaster), running new wire to every box location, installing junction and outlet boxes, and landing wires at the new panel. In practice, the demo side of this phase is messier than most homeowners expect. Dust containment matters if anyone is still living in the house. A reputable crew will hang plastic sheeting, but it won’t be perfect.
The panel installation and breaker landing usually happen toward the end of rough-in, before the inspection hold point. The old service isn’t decommissioned until final — you’ll typically have partial power during this phase, which is why some families manage to stay put, though it’s uncomfortable.
Phase 3 – Inspection, Finish, and Commissioning
Rough-in inspection is a mandatory hold point. No drywall goes up until the inspector signs off. Inspection scheduling is another waiting-game variable — some jurisdictions offer next-day appointments; others run 5–10 business days out. Your contractor should know this cadence for your area and build it into the schedule rather than treating it as a surprise.
After rough-in approval, drywall patching begins. This is typically a separate trade, and coordinating that handoff adds 1–3 days of scheduling buffer. Once walls are closed and paint is dry enough to work against, the electrician returns for device trim-out: installing receptacles, switches, covers, and fixtures. Final inspection follows, and after that approval, the utility coordinates meter reconnection — usually 1–3 business days depending on the utility company’s workload.
Total elapsed time, realistically: 2–5 weeks from permit application to lights on. A simple job in a cooperative jurisdiction with a well-organized contractor might land at 2.5 weeks. A complicated older home in a slow-permit city could stretch to 6 weeks. Plan for the middle of that range and have contingency for the longer end.
Frequently Asked Questions About House Rewiring Costs
Can I rewire only part of my house to save money?
Sometimes, yes — but the answer depends heavily on what triggered the project in the first place. If you have a localized problem, say a single circuit feeding a garage addition that was wired without a permit, a partial rewire is often legitimate and code-compliant. The work stays contained, the inspector signs off on that zone, and you’re done.
The complication arises when partial work touches a system that already has deficiencies. Pull a permit for one new bedroom circuit in a house with 1960s cloth-insulated wiring throughout, and many jurisdictions will flag the entire electrical system for inspection. Your local authority having jurisdiction (AHJ) sets those trigger thresholds — some require full compliance upgrades once you disturb more than a defined percentage of the existing wiring. In practice, homeowners who go in expecting a $1,500 partial fix sometimes come out with a mandatory scope that runs $8,000 or more because the inspector found aluminum branch wiring behind the walls.
So: partial rewires are viable for genuinely isolated problems in homes with otherwise sound, code-compliant wiring. For anything pre-1980 with known legacy materials, get a licensed electrician to assess the whole system before you commit to a partial scope. The incremental savings can evaporate fast.
Does rewiring increase home resale value?
It does, though the uplift varies by market and buyer profile. Appraiser data generally shows a value increase in the range of $5,000–$10,000 for a fully rewired home with a current electrical certificate, depending on the regional market and the age of the previous wiring. The bigger effect is often on time-on-market — buyers and their agents flag old wiring quickly, and a home with documented updated electrical tends to move faster and with fewer inspection contingencies that chip away at the sale price in negotiation.
A fully rewired home with a current electrical certificate typically sells faster and at a higher price than a comparable home with aging, uncertified wiring.True
Updated wiring eliminates a common home inspection red flag, reduces buyer-requested price concessions, and in some markets is a prerequisite for homeowner's insurance approval — all of which support faster, cleaner sales at or near asking price.
Insurance is part of this calculation too. Some carriers refuse to write policies on homes with knob-and-tube or aluminum branch wiring, which directly limits your buyer pool. Rewiring removes that objection entirely.
How do I know if my house needs a full rewire versus a panel upgrade only?
A panel upgrade — swapping in a larger service panel — solves a capacity problem. A rewire solves a wiring condition problem. They’re not the same thing, and confusing them is expensive.
Run through this diagnostic honestly:
- Breaker trips: Occasional trips on a heavily loaded circuit is a capacity issue. Frequent trips on lightly loaded circuits, or breakers that trip and won’t reset cleanly, suggests wiring faults.
- Flickering or dimming lights when appliances cycle on often points to loose connections or undersized branch wiring, not just the panel.
- Outlet discoloration or warmth to the touch is a wiring or device fault. Full stop. That’s not a panel problem.
- Insurance denial: If a carrier has refused coverage or surcharged you specifically for wiring condition (not just service size), you likely need a rewire.
- Age threshold: Wiring older than roughly 40 years — so installed before the mid-1980s — warrants a full professional assessment. The insulation on that vintage of wire can be brittle enough to crack when disturbed during renovation work, creating faults that didn’t exist before someone opened the walls.
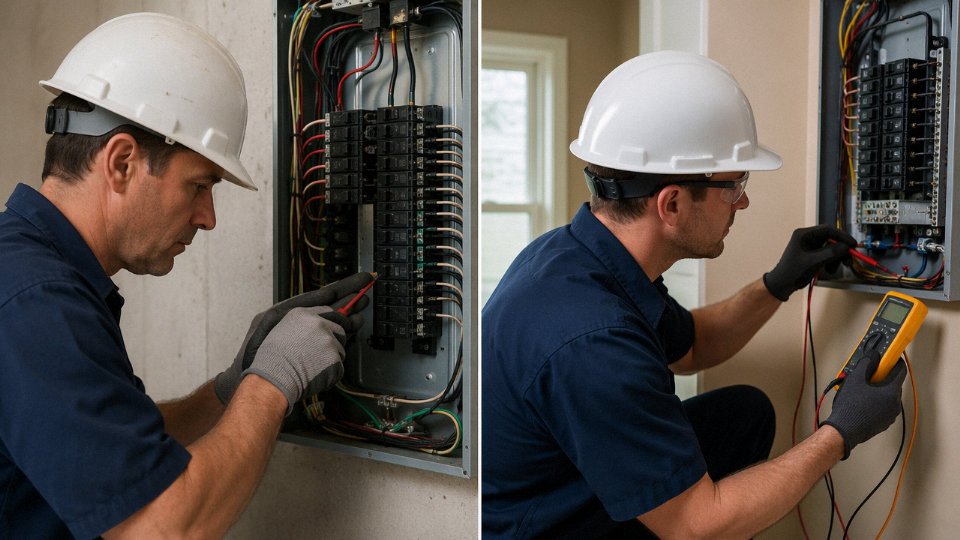
If you’re hitting two or more of those markers, the conversation with your electrician should start with a full system assessment, not a panel quote.
What wire does Jinda supply for residential projects and bulk export?
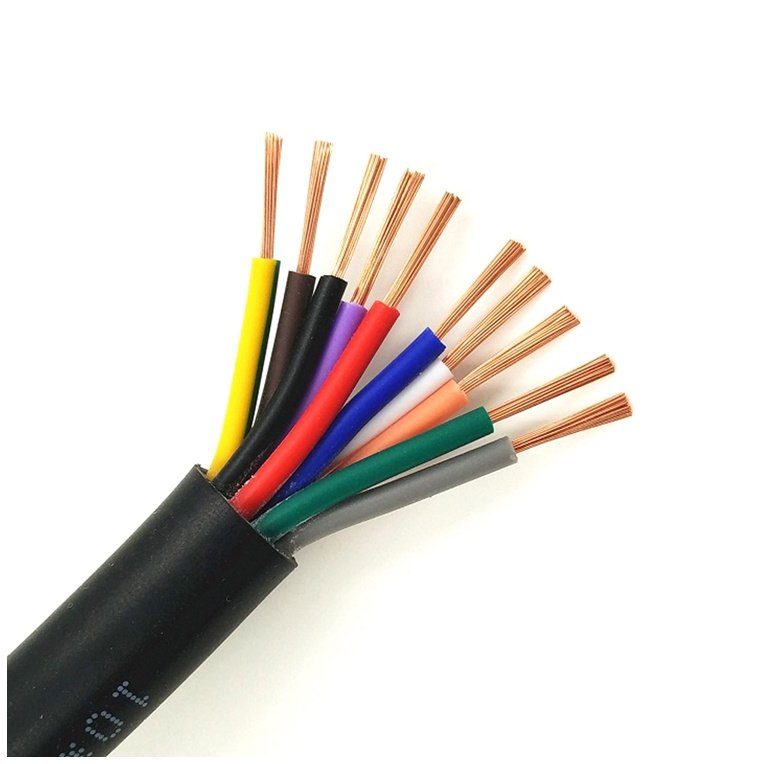
Jinda’s residential product range covers the core cable types that large-scale residential construction and development projects require. That includes NM-B equivalent building wire for dry, interior residential applications; LSZH (low-smoke, zero-halogen) insulated building wire for projects where fire-safety codes mandate reduced smoke toxicity — increasingly common in multi-family and mixed-use construction across European and Middle Eastern markets; and armored cable lines for applications where mechanical protection is required, such as exposed runs in utility rooms or partially finished spaces.
For international contractors and procurement managers sourcing at volume for residential development projects, Jinda works on bulk order quantities that typically start in the range of a full container load, with exact minimums depending on cable type and specification. Lead times, custom insulation colors, and certification requirements (UL, CE, or regional equivalents) are all negotiable at the project planning stage. Direct sourcing through Jinda cuts out intermediate distributors, which on a large residential development — think 50 to 200 units — can represent a meaningful reduction in materials cost per unit. Reach out through Jinda’s international sales channel with your specification sheet and project volume; they’ll give you a realistic landed-cost picture based on your destination port and timeline.