You finished the bathroom renovation, ran a new circuit for the garage workshop, or finally replaced that Federal Pacific panel — and now someone tells you the work needs a permit you never pulled. That stings. Unpermitted electrical work can void your homeowner’s insurance, trigger mandatory remediation orders when you sell, and in the worst cases create fire or shock hazards that no amount of after-the-fact paperwork will fix. The good news is that for most owner-occupied homes, you have a legal path to do this yourself.
In roughly 44 U.S. states, a homeowner can pull their own electrical permit for work on a residence they occupy — no licensed electrician required. Fees typically run $50 to $500 depending on your jurisdiction and the scope of the project. The permit authorizes the work and triggers an inspection; passing that inspection is what makes the job legal, insurable, and transferable when you sell.
What most guides skip is the gap between “you’re allowed to pull the permit” and “you’re ready to pass inspection.” About 20–30% of first-time residential electrical inspections fail — usually on something avoidable: wrong wire gauge, missing GFCI protection in a wet area, or a panel directory that an inspector can’t read. Understanding where homeowners consistently trip up is worth more than a general overview of the application process.
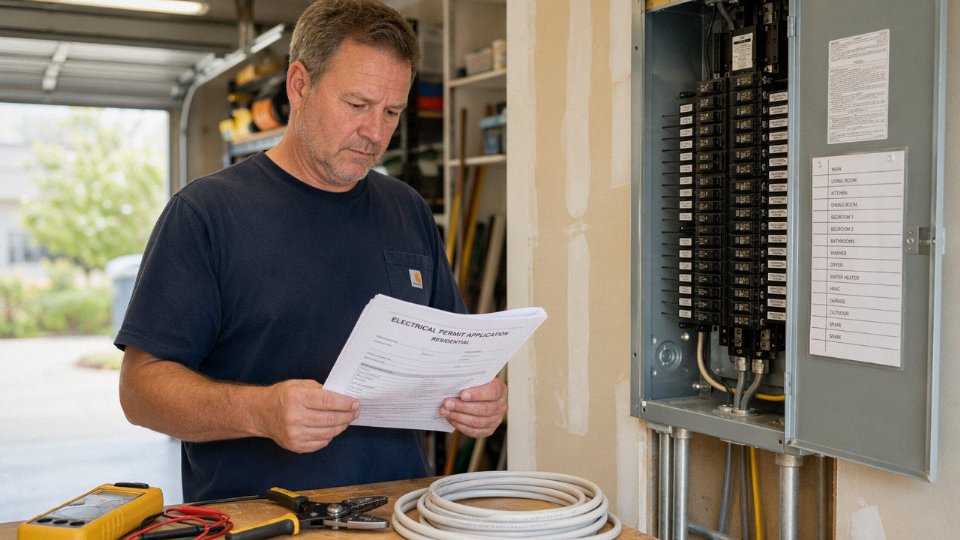
State-by-State and Local Jurisdiction Rules: Where Homeowners Are Allowed to Self-Permit
The first thing to understand here is that there is no single national answer. Electrical permitting authority in the U.S. sits with individual states, and states routinely delegate further authority downward to counties and municipalities. That two-tier structure matters enormously in practice: a state statute might explicitly allow homeowner permits, but the city you live in — operating as its own Authority Having Jurisdiction (AHJ) — can impose stricter requirements on top of that. State law sets the ceiling. Local rules set the actual floor you have to clear.
Roughly 44 U.S. states allow homeowners to pull their own electrical permits for owner-occupied residencesTrue
This reflects the general consensus across state licensing statutes, though eligibility is always subject to local AHJ restrictions, owner-occupancy conditions, and project scope limitations that can effectively narrow access significantly even in permissive states.
States That Give Homeowners Broad Rights — and Those That Don’t
Texas, Florida, and Georgia are commonly cited as states with relatively permissive homeowner permit frameworks. In Texas, for instance, the state licensing statute carves out an explicit exemption for owner-occupants doing work on their own single-family residence, and many Texas counties — particularly rural ones — impose minimal additional hurdles. Florida similarly allows homeowner-builder status with a signed affidavit, though some South Florida municipalities (Miami-Dade specifically) layer on extra documentation requirements that can slow the process considerably.
On the restrictive end, Massachusetts and New Jersey stand out. Massachusetts requires a licensed electrician to pull the permit in most circumstances, and the state’s electrical inspection infrastructure is built around that assumption. New Jersey operates under a similar framework — homeowners can do minor work in some contexts, but for anything involving the panel, service entrance, or new circuits, a licensed contractor is effectively required by the structure of the permitting system, even if no statute explicitly forbids a homeowner from attempting it. The practical result is the same either way.
Common Eligibility Conditions You’ll Sign Your Name To
Where homeowner permits are allowed, they almost always come with attached conditions. Expect to sign an owner-occupancy affidavit — a written declaration that you live in the property as your primary residence and are performing the work yourself, not hiring unlicensed labor. Most jurisdictions restrict this privilege to single-family residential classification; duplexes and multi-unit properties are frequently excluded. If the property generates any rental income, even incidentally, some AHJs will disqualify you outright.
Scope limits are common too. A jurisdiction might allow homeowner permits for branch circuit additions or device replacements but explicitly carve out service entrance upgrades, meter base work, and any utility interconnection — those almost always require a licensed electrician regardless of what the state statute says. This is partly liability, partly utility company policy.
How to Actually Look Up Your Local Rules
Don’t rely on a state-level summary (including this one) to make a final determination. Go to the source. Your county or city building department website is the starting point — search for “[your county] building department electrical permit” and look specifically for residential permit applications, which often list eligibility directly. The state contractor licensing board will publish statutes governing who can perform electrical work. The International Code Council’s website has jurisdiction-lookup tools, though coverage is uneven for smaller municipalities.
When in doubt, call the building department directly and ask two specific questions: “Can an owner-occupant pull their own electrical permit for a single-family home?” and “Are there work categories excluded from homeowner permits?” Write down the name of whoever answers. It matters if you get conflicting information later.
| State | Homeowner Permit Allowed | Key Conditions | Approx. Fee Range |
|---|---|---|---|
| Texas | Generally yes | Owner-occupancy affidavit, single-family only | $50–$150 |
| Florida | Yes, with homeowner-builder status | Signed affidavit, no rental income | $75–$300 |
| Georgia | Generally yes | Owner-occupancy, scope limits apply | $50–$200 |
| California | Varies heavily by city/county | Owner-occupancy affidavit; many cities restrict | $100–$500 |
| Massachusetts | Rarely; licensed electrician typically required | Very limited scope exceptions | $100–$400 |
| New Jersey | Effectively restricted | Panel and service work requires licensed contractor | $75–$350 |
| Ohio | Generally yes | Owner-occupancy, single-family classification | $50–$175 |
| Washington | Varies by county | Some counties require contractor; rural more permissive | $60–$250 |
Fee ranges depend on project scope, square footage of affected area, and local administrative costs — a simple circuit addition will sit at the low end; a panel upgrade will push toward the high end or require a separate fee schedule entirely.
Step-by-Step Process to Apply for and Obtain a Homeowner Electrical Permit
Getting a permit isn’t complicated, but doing it out of order — or skipping documentation the inspector expects — is exactly how homeowners end up with a red tag on rough-in day and a wall they’ve already closed up. Follow the sequence.
Step 1: Define Your Project Scope Before You Touch Anything
This step matters more than most homeowners realize. Adding a single outlet in a finished room is a minor alteration permit in most jurisdictions. Installing a subpanel, upgrading service from 100A to 200A, or rewiring a significant portion of the home typically triggers a different permit category — sometimes requiring a licensed engineer’s stamp or a notarized owner-builder declaration depending on the state.
Be specific in your own notes before you walk into the permit office. “I want to add power in the garage” is not a scope. “One 20A dedicated circuit, 12 AWG NM-B, from the existing main panel to two new receptacles and one overhead fixture in the attached garage” is a scope. That precision shapes every document you’ll need.
Step 2: Gather Your Documentation
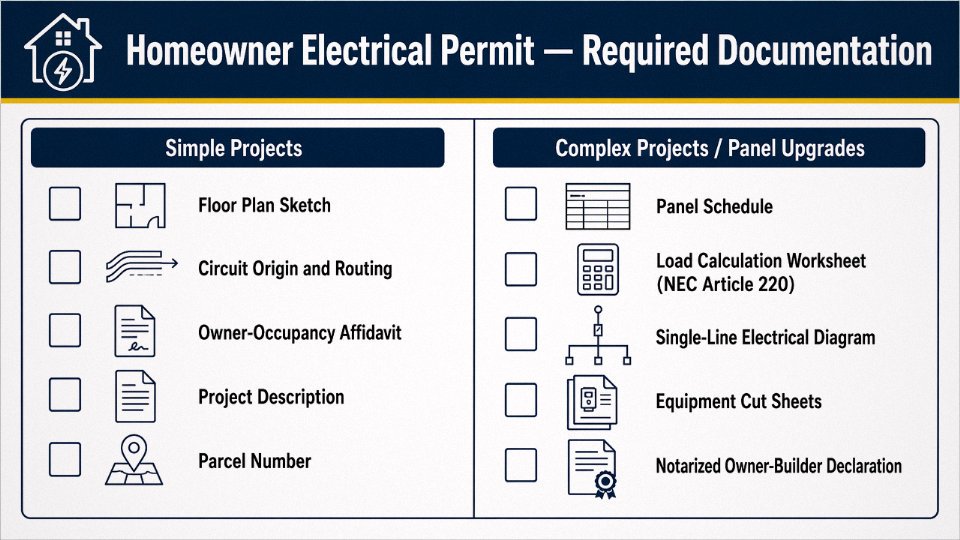
For simple projects — outlet additions, fixture swaps, a single new circuit — most building departments need a basic floor plan sketch showing where the circuit originates, its routing through the structure, and where it terminates. Hand-drawn is usually fine as long as it’s legible and dimensioned.
Larger projects require more. A panel schedule listing every existing and proposed circuit, a load calculation worksheet (NEC Article 220 is the relevant framework), and for anything involving a service upgrade or subpanel, a single-line electrical diagram. Some jurisdictions also want the equipment cut sheets — the spec pages for the panel, breakers, or disconnect you’re installing. Pull those from the manufacturer’s documentation before you show up.
Step 3: Complete the Application
Most mid-size and larger municipalities now offer online portal submission. Smaller counties still run in-person counters, and honestly, in-person is worth the trip for a first-time applicant — you can ask the plan reviewer a question on the spot and avoid a two-week back-and-forth over a missing field.
Standard application fields include property address, parcel number, project description, estimated project valuation (materials plus labor, even if you’re doing the labor yourself), and the homeowner certification statement. That certification is the legal declaration that you own and occupy the property and are performing the work yourself. Sign it carefully — it has implications if you later try to sell the work as contractor-installed.
Step 4: Pay the Fee and Secure Your Permit Number
Fees run roughly $50 to $500 depending on jurisdiction and project size. Some departments charge a flat rate for minor permits; others calculate by circuit count or as a percentage of declared project valuation — typically somewhere in the 1–3% range for the latter, though this varies. You’ll receive either a physical permit card or a digital record with a permit number. That number, and usually the physical card, must be visible at the job site during inspection. Don’t skip this — inspectors have turned around without entering a home over it.
Step 5: Schedule Your Inspections
Rough-in inspection happens before you close walls. The inspector needs to see wire routing, stapling intervals, box fill, and any splices. Final inspection comes after all devices, covers, and fixtures are installed and the panel is fully labeled.
On larger projects, ask about interim inspections. Some jurisdictions allow or even require them at service entrance or panel stages. Scheduling these proactively prevents the inspector from questioning work that’s already been buried.
Step 6: Respond to Correction Notices Promptly
Failed first inspections aren’t rare — roughly 20–30% of residential electrical inspections don’t pass on the first attempt, most often due to wrong wire gauge, missing GFCI protection at required locations, or a panel directory that’s blank or illegible.
A homeowner can simply ignore a failed inspection and finish the work anyway without consequences.False
An open permit with unresolved corrections creates a cloud on the property title. When you sell, the title search will surface it, and buyers' lenders often require permit resolution before closing. In some jurisdictions, the building department can also compel remediation or assess fines.
When you get a correction notice — sometimes called a red tag — read every line, fix every item, and document what you changed with photos. Re-inspection fees vary; some departments allow one free re-inspection, others charge $50–$150 for each return visit. Don’t schedule the re-inspection until every item on the correction list is actually resolved.
Keep the permit active until the final inspection is signed off. An abandoned permit — one that never received a final — sits on the property record indefinitely. It doesn’t expire quietly. It shows up in title searches, it raises questions about whether the work was ever completed to code, and it can delay or kill a property sale years after you’ve forgotten the project existed.
Electrical Work Homeowners Can and Cannot Legally Do Themselves Under Most Codes
Not every jurisdiction draws the line in the same place, but there is a reasonably consistent pattern across U.S. codes — and understanding it before you touch a single wire breaker is what separates a smooth inspection from a costly re-do.
What Most Codes Allow Homeowners to Do
For owner-occupied single-family residences, the work typically permitted under a homeowner self-permit includes replacing outlets, switches, and light fixtures; installing ceiling fans on existing circuits; adding branch circuits from an existing panel; and running new wiring through walls or attic space. In many jurisdictions, replacing a subpanel is also on the table for a competent homeowner, provided the work is inspected. That last one surprises people. It’s not uncommon, and some inspectors are frankly fine with it as long as the work is neat, correctly bonded, and the breaker sizing makes sense.
Adding circuits from an existing panel is where most homeowners underestimate the complexity. Panel capacity, available breaker slots, load calculations — none of that is especially mystifying once you sit with it, but it does require you to actually check the math, not just guess.
Where the Line Gets Hard
Utility service entrance conductors are off-limits. Period. The conductors running from the utility transformer to your meter base are energized and unprotected, and no permit in any state authorizes a homeowner to touch them. Meter base installation or modification is similarly restricted — that work is coordinated between a licensed electrician and the utility, and the utility has to sign off before power is restored. Any tampering with utility company equipment is a separate legal issue entirely, beyond just code.
Work on commercially zoned properties is restricted to licensed contractors in most states, even if the same homeowner owns the building.
NEC 2023 Requirements That Catch DIYers Off Guard
The 2023 National Electrical Code significantly expanded where AFCI (arc-fault circuit interrupter) protection is required. It now covers nearly all habitable rooms — bedrooms, living rooms, dining areas, and in many interpretations, hallways and closets feeding those spaces. If you’re adding a circuit in any of those areas and your panel predates AFCI-capable breakers, you may need to upgrade that slot. That adds cost and complexity that homeowners don’t always budget for.
GFCI requirements now extend to garages, crawlspaces, unfinished basements, outdoor receptacles, and any receptacle within 6 feet of a sink, regardless of room. Tamper-resistant receptacles are mandatory for new or replaced receptacles in dwelling units. These aren’t obscure requirements — they’re the three most common reasons first-time residential inspections fail, accounting for roughly 20–30% of failed attempts across jurisdictions.
GFCI protection is only required in kitchens and bathrooms under current NEC standards.False
NEC 2023 mandates GFCI protection in garages, crawlspaces, unfinished basements, outdoor areas, and any location within 6 feet of a sink, significantly beyond kitchens and bathrooms.
Aluminum Wiring — Don’t Assume
Homes built between roughly 1965 and 1973 may have aluminum branch circuit wiring, and that is a genuinely different situation from aluminum service entrance conductors, which are still common and not inherently problematic. The branch circuit aluminum is the concern — it requires CO/ALR-rated devices, anti-oxidant compound at connections, and ideally pigtailing with copper at each device. If you open a box and see dull gray wire, don’t assume it’s just dirty copper. Misidentifying aluminum branch wiring is one of those mistakes that leads to loose connections, arcing, and eventually a fire.
Low-Voltage and Class 2 Work
Doorbells, thermostats, landscape lighting transformers, and similar Class 2 circuits typically fall below the permit threshold in most jurisdictions. In practice, that means a homeowner can swap a thermostat or run new doorbell wire without filing paperwork. That said, NEC guidelines still apply in spirit — proper wire gauge, no splices stuffed in walls without junction boxes, correct transformer sizing for landscape lighting loads. Skipping the permit doesn’t mean skipping the standards.
Wire Selection Is Not a Footnote
Using the wrong conductor type or gauge is genuinely one of the most common inspection failures. NM-B cable (the standard Romex-style product most homeowners are familiar with) is not rated for all locations — it can’t go in conduit exposed to direct sunlight, in wet locations, or in certain commercial or multi-family applications. Underground circuits need UF-B or conductors in appropriate conduit. Oversizing or undersizing conductor gauge relative to the breaker size is a code violation, and inspectors will catch it. Source wire and cable that’s clearly marked with its NEC listing and temperature rating. If the label is worn off or ambiguous, that’s a problem before the inspector even shows up.
Choosing the Right Wire and Cable for Permitted Residential Electrical Projects
Once you have your permit in hand, the inspector’s attention shifts almost entirely to whether your materials match the job. Getting the regulatory paperwork right and then installing undersized wire is one of the most common ways a first-time DIY permit holder ends up failing reinspection — and paying re-inspection fees that dwarf the original permit cost.
Conductor Sizing: What the NEC Actually Requires
The National Electrical Code ties wire gauge to ampacity, and there is very little wiggle room here. Standard branch circuits in most homes run on 14 AWG copper for 15-amp circuits and 12 AWG for 20-amp circuits — the difference matters because a 12-amp load running continuously on 14 AWG wire will overheat the insulation over time, even if the breaker doesn’t trip immediately. Kitchens, bathrooms, laundry rooms, and garage outlets typically require dedicated 20-amp circuits, so 12 AWG is the floor in those spaces.
Dryers and water heaters usually land on 30-amp circuits, which means 10 AWG. Electric ranges and some EV charger installations step up to 8 AWG or even 6 AWG depending on the load — check the appliance nameplate, not just the breaker rating. Inspectors will.
Cable Types Inspectors Expect to See
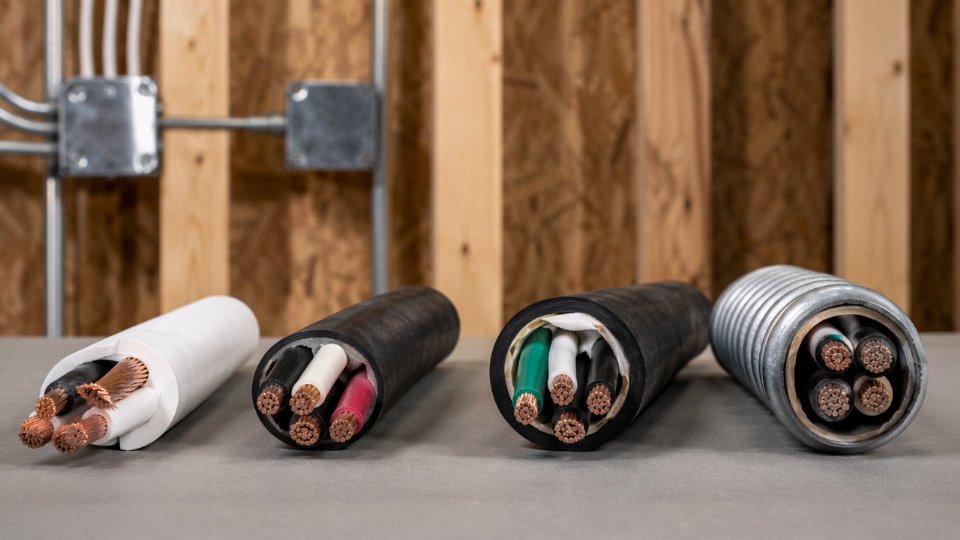
NM-B (commonly sold under the Romex trade name, though that’s a Southwire brand) is the standard for interior dry-location residential work. It’s what most inspectors expect to see running through stud bays and attic spaces. The moment you go underground or into a wet location — outdoor outlets, direct-burial runs to a detached garage — you need UF-B, which has a solid thermoplastic jacket around each conductor rather than a paper wrap inside a loose outer sheath. Substituting NM-B in a direct-burial trench is an automatic fail, full stop.
MC cable (metal-clad, armor-wrapped) shows up more often in commercial work but is required by some jurisdictions for exposed runs in garages, basements with open framing, or anywhere the local amendment to the NEC demands mechanical protection. If you’re running individual conductors through conduit — say, for a subpanel feed or an outdoor circuit in rigid PVC — you’ll typically be pulling THHN/THWN-2, which is rated for both dry and wet conduit applications up to 90°C.
What’s Printed on the Jacket — and Why It Matters to the Inspector
Every compliant cable sold for U.S. residential use carries printed markings on the jacket: conductor size, number of conductors, voltage rating (typically 600V for residential types), temperature rating, and the UL listing mark. An inspector will physically read that printing. If the jacket says “14 AWG / 2 with ground / NM-B / 600V / 60°C/90°C” and carries a UL mark, you’re in good shape. If any of those markings are missing, smeared, or inconsistent with what the cable actually appears to be, expect a conversation — and possibly a stop-work order until the material is verified or replaced.
Cables without a valid UL listing mark will automatically fail a U.S. residential electrical inspection.True
NEC 110.3(B) requires that listed equipment be installed in accordance with its listing and labeling. An inspector who cannot verify the UL listing has grounds to reject the installation, requiring material replacement before reinspection.
The Real Risk of Off-Brand or Uncertified Cable
This is worth saying plainly: not all wire sold online or through secondary suppliers meets the conductor purity standards that UL 83 and UL 719 testing verifies. Copper-clad aluminum sold as solid copper, undersized stranding, and insulation compounds that soften at lower temperatures than the jacket rating claims — these are real problems in the supply chain, not theoretical ones. Under sustained load, insulation failure in a wall cavity doesn’t announce itself. It smolders.
For a single-family renovation, buy NM-B or UF-B from a recognized electrical distributor or major home center. For larger projects — multi-unit residential renovations, apartment developments, or contractor bulk procurement — the calculus changes, and verifying manufacturer credentials against IEC 60228, UL 83, or UL 719 standards becomes genuinely important rather than bureaucratic box-checking. IEC 60228 governs conductor construction and resistance; UL 83 covers thermoplastic-insulated wires; UL 719 applies specifically to NM cable. A supplier who can provide third-party test reports against these standards and show traceable UL certification is a fundamentally different proposition from one who cannot.
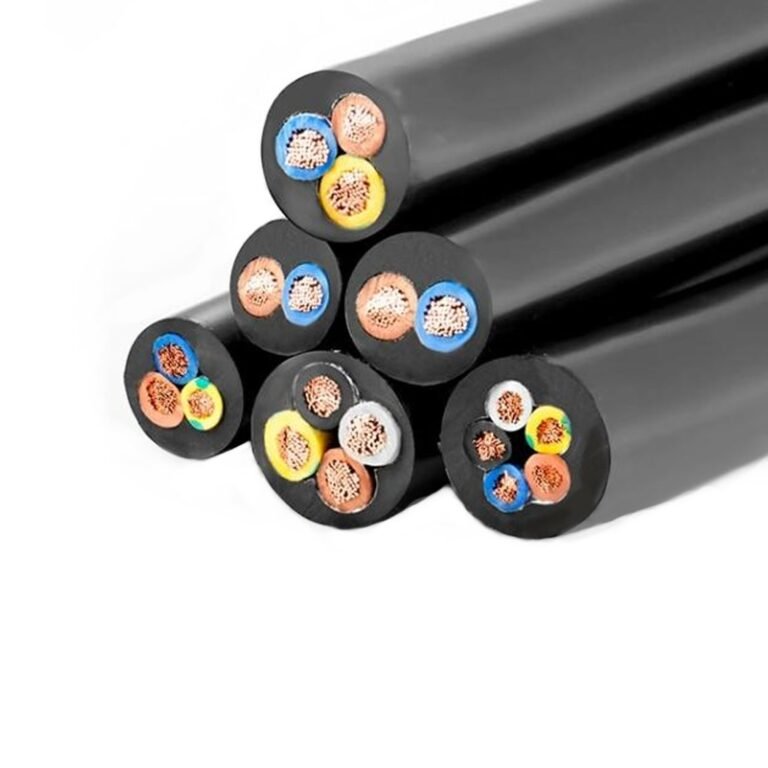
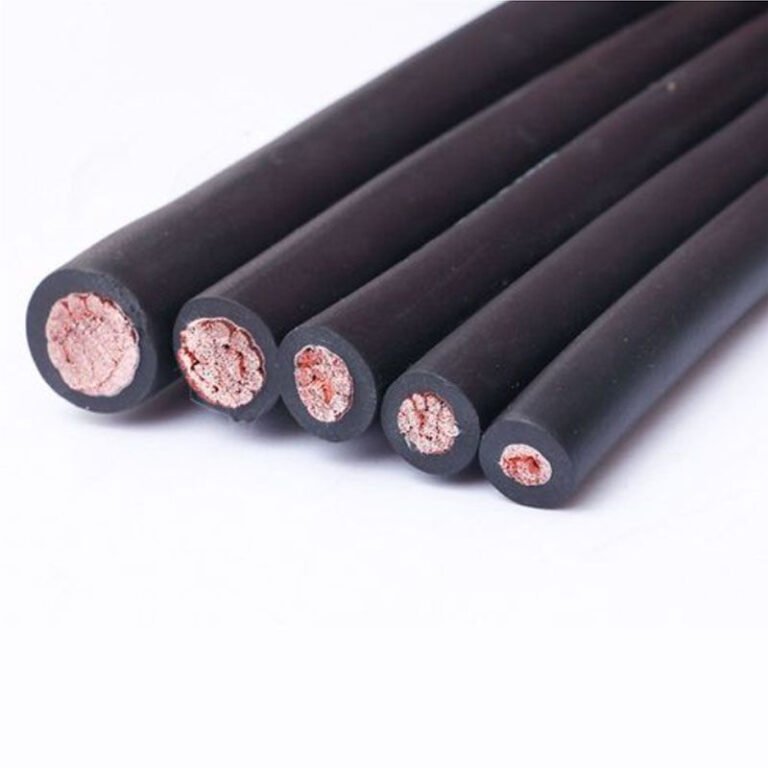
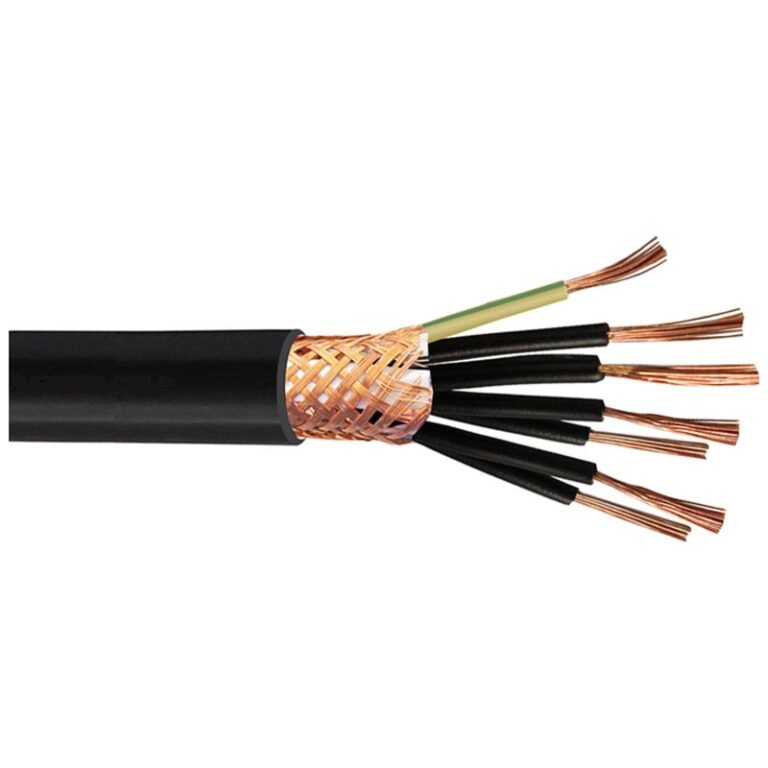
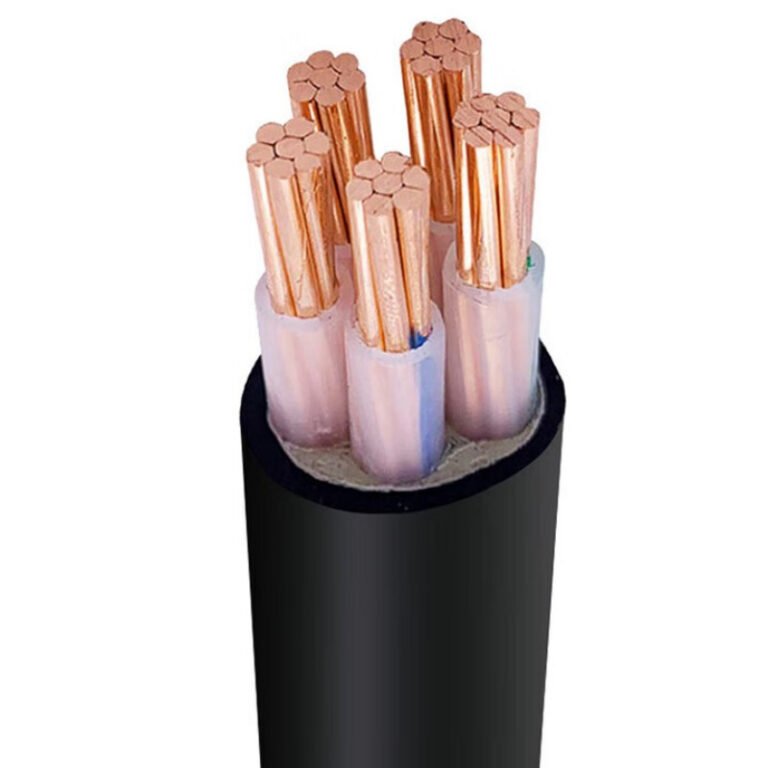
Shandong Jinda Special Cable Group manufactures cables to international standards including IEC specifications and holds experience supplying projects across more than 50 countries — the kind of manufacturing infrastructure and QA traceability that contractors and developers sourcing materials at scale should be looking for when per-unit cable quality directly affects inspection outcomes and long-term liability.
What Electrical Inspectors Check During Rough-In and Final Inspections
Getting to inspection day without a failed re-inspection — which typically costs another $50–$150 depending on jurisdiction — comes down to one thing: knowing what the inspector is looking for before they show up. Most failed rough-ins aren’t catastrophic errors. They’re small, fixable oversights that a thirty-minute self-audit would have caught.
Rough-In Inspection: What Gets Scrutinized Before Drywall Goes Up
The rough-in is your most important checkpoint. Once walls are closed, correcting problems gets expensive fast.
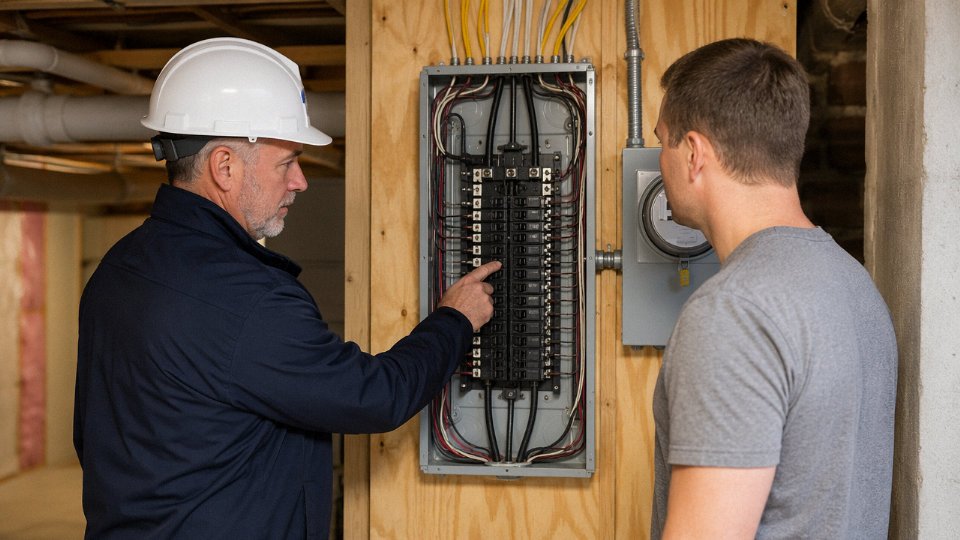
Box fill is the one calculation homeowners most often skip. NEC Article 314 assigns cubic-inch values to every conductor, device, and fitting inside a box — exceed the box’s rated volume and you’ll fail, full stop. A standard single-gang plastic box rated at 18 cubic inches fills up faster than you’d expect once you account for the receptacle, the grounds bundled together, and two or three 12 AWG conductors. Do the math before you buy boxes, not after.
Cable stapling is another easy inspection failure. NM-B cable (your standard Romex-type) needs support every 4.5 feet and within 12 inches of every box. In practice, most inspectors also want to see the cable running tight and neat — not draped in loose loops between joists. Through studs, you need either a 1¼-inch setback from the stud face or a nail plate to protect the cable from drywall screws. Inspectors absolutely check this, especially in new partition walls.
Box mounting depth matters more than most DIYers realize. If you’re installing in a finished or finishing wall, the box face must sit flush or no more than ¼ inch recessed from the finished surface per NEC 314.20. Drywall thickness varies — ½ inch is standard but ⅝ inch shows up in garage and basement applications — so account for that before you nail the box.
Panel and Wiring: Where Inspectors Are Getting Stricter
Torque specifications on conductor terminations used to be loosely enforced. That’s changing. Inspectors increasingly arrive with a torque screwdriver and verify that breaker terminals and bus bar connections hit the values stamped on the equipment — usually in the range of 20–35 in-lb for residential breakers, though it varies by manufacturer. Under-torqued connections cause resistance heating over time. This is not a theoretical risk.
Double-tapping — landing two conductors under a single breaker terminal not rated for it — is an automatic failure. So is improper neutral-ground bus separation in a subpanel. In a main panel the neutral and ground can share a bus; in a subpanel they must be separated and the neutral must float. Many DIYers wire subpanels the same way they’d wire a main, which is wrong and will not pass.
Breaker-to-wire gauge matching is basic but inspectors verify it: 15A breakers on 14 AWG, 20A on 12 AWG. Mixing these — particularly running 14 AWG on a 20A breaker — is a fire hazard and an immediate failure.
AFCI and GFCI: Expect the Inspector to Actually Test Them
Inspectors don’t just look at AFCI breakers and GFCI devices — they test them. They’ll press the test button on every GFCI receptacle and verify the downstream outlets drop. AFCI breakers get tested with the test button or a portable arc-fault tester. Location compliance is verified against NEC 210.8 (GFCI) and 210.12 (AFCI) — bedrooms, kitchens, bathrooms, garages, and other specified areas all have specific requirements that have expanded with each code cycle.
AFCI protection is required in all 120V, 15A and 20A branch circuits in dwelling unit bedrooms under the 2020 NEC, with broader requirements in newer code editions.True
NEC 210.12 has progressively expanded AFCI requirements across code cycles; the 2020 NEC requires AFCI protection in nearly all dwelling unit living spaces, though local jurisdictions may have adopted an earlier edition.
Final Inspection: What Closes the Permit
By final inspection, everything needs to be buttoned up. Every junction box needs a cover plate — open boxes in attics and crawlspaces are among the most common final-inspection failures, partly because homeowners forget they’re there. All devices must be properly seated and secured, not rocking loose in oversized cutouts. The panel schedule needs to be filled in legibly; a blank or partially labeled directory will fail in most jurisdictions.
Permit documentation must be on-site and accessible — either the physical card or a digital copy depending on what your AHJ (authority having jurisdiction) issued. Inspectors have turned away from jobs for less.
Once the final passes, the inspector signs off and the permit closes. You’ll receive documentation — keep it permanently with your property records. It matters at resale, during refinancing appraisals, and if you ever need to prove to an insurance company that the work was done to code.
Cost Analysis: Homeowner Permit vs. Hiring a Licensed Electrician with Permit
The honest answer most people don’t want to hear: for a single-circuit addition, DIY self-permitting often saves less money than homeowners expect. For a whole-house rewire or a major addition with 20-plus circuits, the savings can be substantial enough to justify the learning curve and the headaches. The math depends heavily on your specific project scope, your local re-inspection fee structure, and whether you already own the tools.
Breaking Down the Permit-Only Cost Side
The permit application fee itself — $50 to $500 depending on jurisdiction and project scope — is rarely the budget item that surprises people. What bites first-time DIY permit-holders is the tool investment they didn’t account for. A decent non-contact voltage tester, a digital multimeter, fish tape, and a conduit bender will run you somewhere between $150 and $600 depending on whether you buy Fluke-grade or entry-level Klein, and whether your project requires rigid conduit work at all. For a single outlet circuit, you might get away with $80 in tools. For a basement finish with 12 circuits and a subpanel, you’ll want the full kit and then some.
Re-inspection fees are the real wildcard. At $30 to $150 per visit — that range depends almost entirely on the municipality — a single red tag that sends you back to correct a GFCI wiring error, fix reversed polarity, or re-label a breaker panel can erase a meaningful chunk of your projected savings. Failed first inspections run roughly 20–30% of residential attempts, mostly on things that are genuinely easy to get wrong: wrong wire gauge for the circuit amperage, missing AFCI protection in bedroom circuits, panel directory not filled out legibly. Budget for at least one re-inspection visit if this is your first permit pull.
What a Licensed Electrician Actually Costs for Equivalent Work
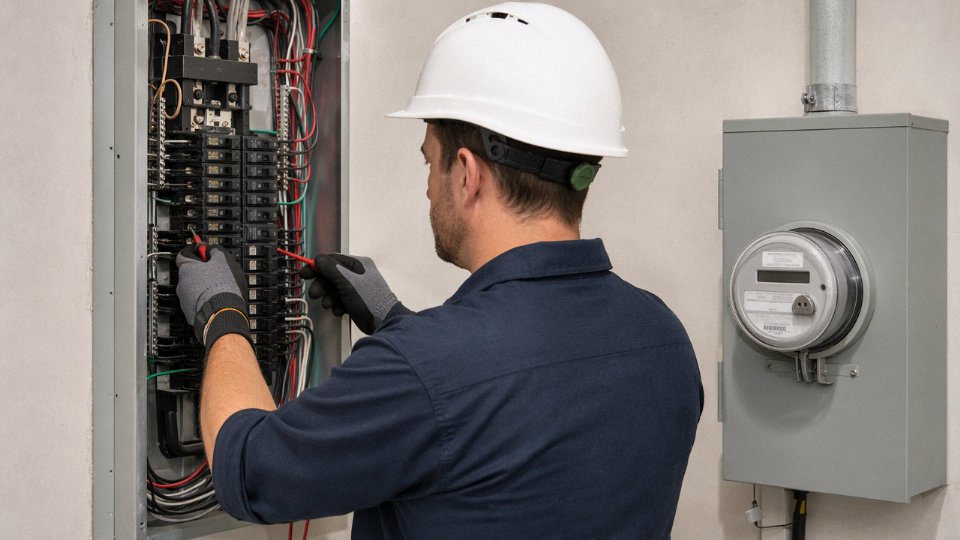
A licensed electrician adding a dedicated 20-amp kitchen circuit — pulling the permit themselves, running the wire, installing the receptacle, connecting at the panel — typically lands between $300 and $800 all-in. That range shifts based on travel time, whether the panel has open slots, and local labor rates (coastal markets skew high). A panel upgrade from 100A to 200A service runs $1,500 to $4,000 depending on whether the utility needs to move the meter, whether the service entrance wiring needs replacement, and regional permit costs. Those aren’t fuzzy estimates; that’s genuinely where the market sits across most of the U.S. right now.
For a single circuit addition, your realistic DIY savings over hiring an electrician might be $150 to $400 after tools and permit fees. That’s not nothing, but it’s also a Saturday and an evening of your time, some drywall patching, and the mental overhead of inspection prep.
No claim provided.True
No explanation available.
The Insurance Problem Nobody Mentions Until After the Fire
This is the part that genuinely matters more than the permit fee arithmetic. Many homeowner insurance policies include language requiring that electrical work be performed by a licensed contractor or, at minimum, that completed work be inspected and the permit formally closed. An open permit — or worse, work done without any permit — can give an insurer grounds to deny a claim following an electrical fire. Not “might” — actually can, and does. Check your policy declarations and call your agent before you start work, not after.
Work done incorrectly that requires opening up finished walls multiplies material cost fast. One incorrect wire termination that doesn’t show up until final inspection means cutting drywall, re-running wire, patching, repainting. On a bedroom circuit that’s $200 in materials and a weekend. On a kitchen that’s closer to $800.
The Hybrid Approach That Actually Makes Sense
For complex projects, the most cost-effective path is usually: homeowner pulls the permit and performs the rough-in — running cable through framing, installing boxes, making branch circuit connections at receptacles and fixtures — while subcontracting specifically the panel work and service entrance connections to a licensed electrician. This keeps the dangerous, technically demanding work in professional hands, satisfies most insurance requirements, and still captures the bulk of the labor savings. Some electricians will agree to this arrangement readily; others won’t touch a job mid-stream. Get that agreement in writing before you start your rough-in.
Risks of Skipping the Permit Process and How to Legalize Unpermitted Electrical Work
The permit feels like friction. You’ve watched a few videos, you understand the basics, your neighbor did his basement without one and nothing bad happened. That logic is understandable — and it leads to some of the most expensive residential electrical mistakes a homeowner can make, usually years after the work is done when they can least afford it.
The Financial and Legal Exposure Is Larger Than Most People Expect
Municipalities have real enforcement teeth. A building inspector or code officer who notices new electrical fixtures, a freshly drywalled room, or a panel upgrade during a neighboring project can issue a stop-work order on your property — even retroactively on completed work. Fines range from roughly $100 on the low end in small municipalities up to $5,000 or more in jurisdictions with active enforcement, and some localities compound fines daily until the violation is resolved. Worst case: the city requires you to demolish finished work — drywall, ceilings, whatever is covering the wiring — so an inspector can verify the installation before you close it back up. That bill, depending on the scope, can dwarf what you saved by skipping the permit.
Municipalities can legally require demolition of finished work to expose unpermitted wiring for inspection.True
Building codes in most U.S. jurisdictions grant local authorities the power to require destructive inspection of concealed work performed without a permit. This is documented in model codes such as the International Residential Code (IRC) Section R105 and locally adopted equivalents.
What Happens at the Closing Table
This is where unpermitted work becomes a hard financial number. A buyer’s home inspector will note any work that doesn’t have a corresponding permit on file — panel upgrades, added circuits, subpanels, finished basement wiring. Appraisers working on behalf of lenders flag the same things. When they do, the lender may refuse to finance the property until the work is legalized, which effectively kills the deal or forces a price negotiation. Sellers in this position either accept a discount (often far exceeding what the original permit would have cost), pay for after-the-fact legalization themselves, or watch the sale fall through. It’s a painful position to be in, especially in a slower market where buyers have leverage.
Insurance Claim Denial Is a Real Mechanism, Not a Theoretical One
Most standard homeowner’s insurance policies contain language — often buried in the exclusions section — that limits or voids coverage for losses caused by work that doesn’t meet local building codes. If an electrical fire is traced back to unpermitted wiring, the insurer’s investigator will pull the permit history. A circuit installed without a permit, without inspection, and without verified compliance can be treated as a contributing cause of the loss. In practice, this means a total or partial claim denial on a fire that destroys the home. The policy language varies by carrier, so worth actually reading your declarations page.
The After-the-Fact Permit Process
Legalizing unpermitted electrical work is possible, but it costs more than doing it right the first time. Most jurisdictions offer an “as-built” or after-the-fact permit process. Expect to pay roughly double the standard permit fee as a penalty — the exact multiplier varies by municipality. You’ll almost certainly need to open walls to expose the wiring for inspection, correct anything that doesn’t meet current code (which may be stricter than when the work was done), and schedule re-inspections. Before buying or selling a home with suspected unpermitted electrical work, a licensed electrician — not just a general home inspector — is worth the cost. A qualified electrician can trace circuits, identify wire gauges, evaluate the panel condition, and give you a realistic remediation estimate. Standard home inspectors are generalists; they’re not equipped to evaluate code compliance at the component level.
Why Homeowners Skip Permits Anyway
Cost and time are the obvious reasons. The permit fee stings when you’re already buying materials. The inspection scheduling adds days to a weekend project. A neighbor swears he never bothers. But the permit process is, at its core, a free quality-control review by someone with enforcement authority and no financial stake in the outcome. An inspector who catches an undersized wire gauge or a missing GFCI on a bathroom circuit is doing you a favor — before that wiring is inside your walls for the next thirty years. That framing is worth keeping in mind before you decide the process isn’t worth the hassle.
Frequently Asked Questions About Homeowner Electrical Permits
Can a homeowner pull a permit for a panel upgrade or service entrance work?
Usually yes on the panel itself — most jurisdictions that allow homeowner permits include main panel replacement in that category, provided it’s owner-occupied and you’re doing the work yourself. The hard stop comes at the meter base and service entrance conductors. That equipment is utility company property, and your local utility will not reconnect service unless a licensed master electrician signs off, sometimes with a separate utility inspection entirely. Don’t conflate the two scopes. Plenty of homeowners have pulled permits, done excellent panel work, and then been surprised when the utility refuses reconnection without a licensed master’s signature on the service entrance. Sort out which work is yours and which is the utility’s before you start scheduling anything.
Do I need a permit to replace an outlet or switch?
Straight like-for-like replacement — same location, same voltage, same amperage — is exempt from permit requirements in most jurisdictions. Swap a dead outlet for a new one of identical spec, and you’re generally fine. The moment you add a new outlet, relocate an existing one, or upgrade to GFCI protection where none existed before, you’ve crossed into new work, and most codes require a permit for that. The GFCI situation trips people up constantly. Adding GFCI protection sounds like a safety improvement (it is), but it changes the circuit’s function from an inspector’s standpoint.
Like-for-like outlet replacement never requires a permit.False
While most jurisdictions exempt identical device replacement from permit requirements, some municipalities require permits even for direct replacement work. Always verify with your local building department before assuming an exemption applies.
What happens if I sell my house with unpermitted electrical work?
Disclosure rules vary significantly by state, but the financial exposure is real either way. If a buyer’s inspector finds unpermitted work during due diligence, you’re negotiating from a weak position — price reductions, repair credits, or deals falling apart entirely. Worse is undisclosed work discovered after closing. Depending on your state, that can open the door to breach-of-contract claims and demands for post-closing remediation costs, which often run higher than the original permit and inspection would have cost. Title insurance typically doesn’t cover this. The math rarely favors skipping the permit.
How long does a homeowner electrical permit take to get approved?
Simple projects — a circuit addition, a subpanel for a detached garage — are often issued over the counter, same day, sometimes in under an hour. Anything that requires a plan review stretches out. Depending on the jurisdiction’s current backlog (which is genuinely seasonal in many areas; spring and summer overwhelm most building departments), expect roughly 3 to 15 business days. Some urban jurisdictions are running longer than that right now. If timing matters for your project, call the building department before you submit and ask directly about current review times. That one phone call saves a lot of frustration.
Can I hire an electrician to do the work but pull the permit myself?
In most jurisdictions, no. This is a popular cost-saving idea that doesn’t hold up in practice. When a licensed contractor performs electrical work, they are typically required by state licensing law to pull the permit in their own name — because they carry the liability. The permit holder is legally responsible for code compliance, and code enforcement in most states doesn’t allow that responsibility to sit with an unlicensed homeowner when a licensed professional did the actual work. A few rural jurisdictions are more relaxed about this, but don’t assume. Ask your building department directly.
Is homeowner-pulled electrical work covered by homeowners insurance?
This is the question people forget to ask until it’s too late. Work completed under a properly closed permit — meaning it passed final inspection — is generally considered insurable by most carriers. Unpermitted work is a different story; many policies exclude coverage for losses caused by or related to code violations, and unpermitted work is by definition a code violation. Even with a permit, coverage depends on your specific policy language. Get confirmation from your insurer in writing before starting work, not after. A one-paragraph email response from your agent creates a paper trail that matters if you ever file a claim.
What wire and cable standards should I specify to pass inspection?
Start with UL listing — every cable you install in a permitted residential project should carry a UL mark, full stop. Beyond that, verify the NEC-compliant markings on the cable jacket: voltage rating, AWG size, insulation type (NM-B for standard indoor residential runs, for instance), and temperature rating. Inspectors will look at that jacket marking, and if it’s not legible or doesn’t match the circuit’s ampacity requirements, you’re getting a failed inspection. AWG sizing relative to breaker ampacity is where the most common mistakes happen — 14 AWG on a 20-amp circuit being the classic error.
For homeowners sourcing larger quantities or managing multi-unit projects, it’s worth confirming IEC 60228 compliance if any cable originates internationally, since conductor cross-section equivalencies between AWG and metric sizing don’t always translate the way suppliers imply. Reputable manufacturers will provide test reports and compliance documentation on request; if they won’t, that’s a reasonable signal to source elsewhere.